
 I’m calling this a DIY Mask for Techies because the basic materials are something that every techie has in their drawer: a t-shirt, a couple of conference lanyards, and a paperclip. Of course, you don’t have to be a techie to make one. 🙂
I realize that this is way, way off topic for this blog, and for me in general, but unusual times lead to unusual solutions. This is a long, DIY instructional post, and if you prefer to watch it instead of read it, I’ve recorded the same information as a video. Click on any of the photos in this post to see it at full resolution.
There’s a variety of recommendations on whether or not to wear a mask if you are not exhibiting any symptoms of illness. In some countries that have had success in reducing infection rates, they have a general policy of wearing a mask in public regardless of symptoms, since carriers can be asymptomatic.
I’m choosing to wear a mask when I leave home, or when I greet people who come to the door. Since it’s very difficult to buy medical-grade masks now, I’ve opted to make my own. I’ve also made a few for friends, especially those who have to walk their dogs, or work in an essential service that requires them to leave home.
I’m going to take you through the method that I used, with photos of each step, so that you can make your own. Although I use a sewing machine here, you can sew these by hand, or you could even use fabric glue or staples if you don’t have a needle and thread, or are in a hurry.
Design considerations
I did a lot of research before I started making masks, but my final design was based on these two references.
First, a Taiwanese doctor posted on Facebook about how to make a three-layer fabric mask, with two layers of fabric and an inside pocket where you can insert a filter layer. This is the basic premise of my design.
Second, there was a study published that compared different readily-available household fabrics against medical-grade masks to see what worked best. Believe it or not, a double layer of t-shirt material works pretty well.
Materials
I went through several iterations to try and make the materials something that a lot of people would already have, since it’s hard to get out shopping these days. Based on the suggested materials, I started with a large t-shirt from my husband’s collection of the many that I have brought home to him from conferences. To all of you vendors who provided me with t-shirts in the past, we thank you!
Next, I needed something to make ties, since these work better than elastic, and I didn’t have a lot of elastic on hand. Remember all of those conferences I went to? Yup, I still had a lot of the conference lanyards hanging in a closet. I provide a hack at the end of these instructions to use the bottom hem of the t-shirt if you don’t have conference lanyards, or you can use other types of ties such as shoelaces.
The paperclip was added in the third-to-last design iteration after I went out for a walk and found that my glasses steamed up due to a gap between the mask and the sides of my nose. It’s sewn into the top edge of the mask to create a bendable nose clip that can be adjusted for each wearer.
Caveats
Just a few caveats, since these are NOT medical-grade masks and I make no specific claims about their effectiveness:
- They do not form a tight seal with your face, although they hug pretty closely.
- They do not use medical-grade materials, and are not going to be as effective at filtering out the bad stuff.
- In general, these masks may not provide complete protection. If you have medical-grade or N95 masks at home, you could use those and they would be better than these, but I recommend that you donate the medical-grade and N95 masks to your local healthcare organization so that front-line doctors and nurses are protected.
All in all, not perfect, but I believe that wearing a DIY fabric mask is better than wearing no mask at all.
Getting started and installing the nose clip
 Let’s get started with the basic measuring and installing the nose clip.
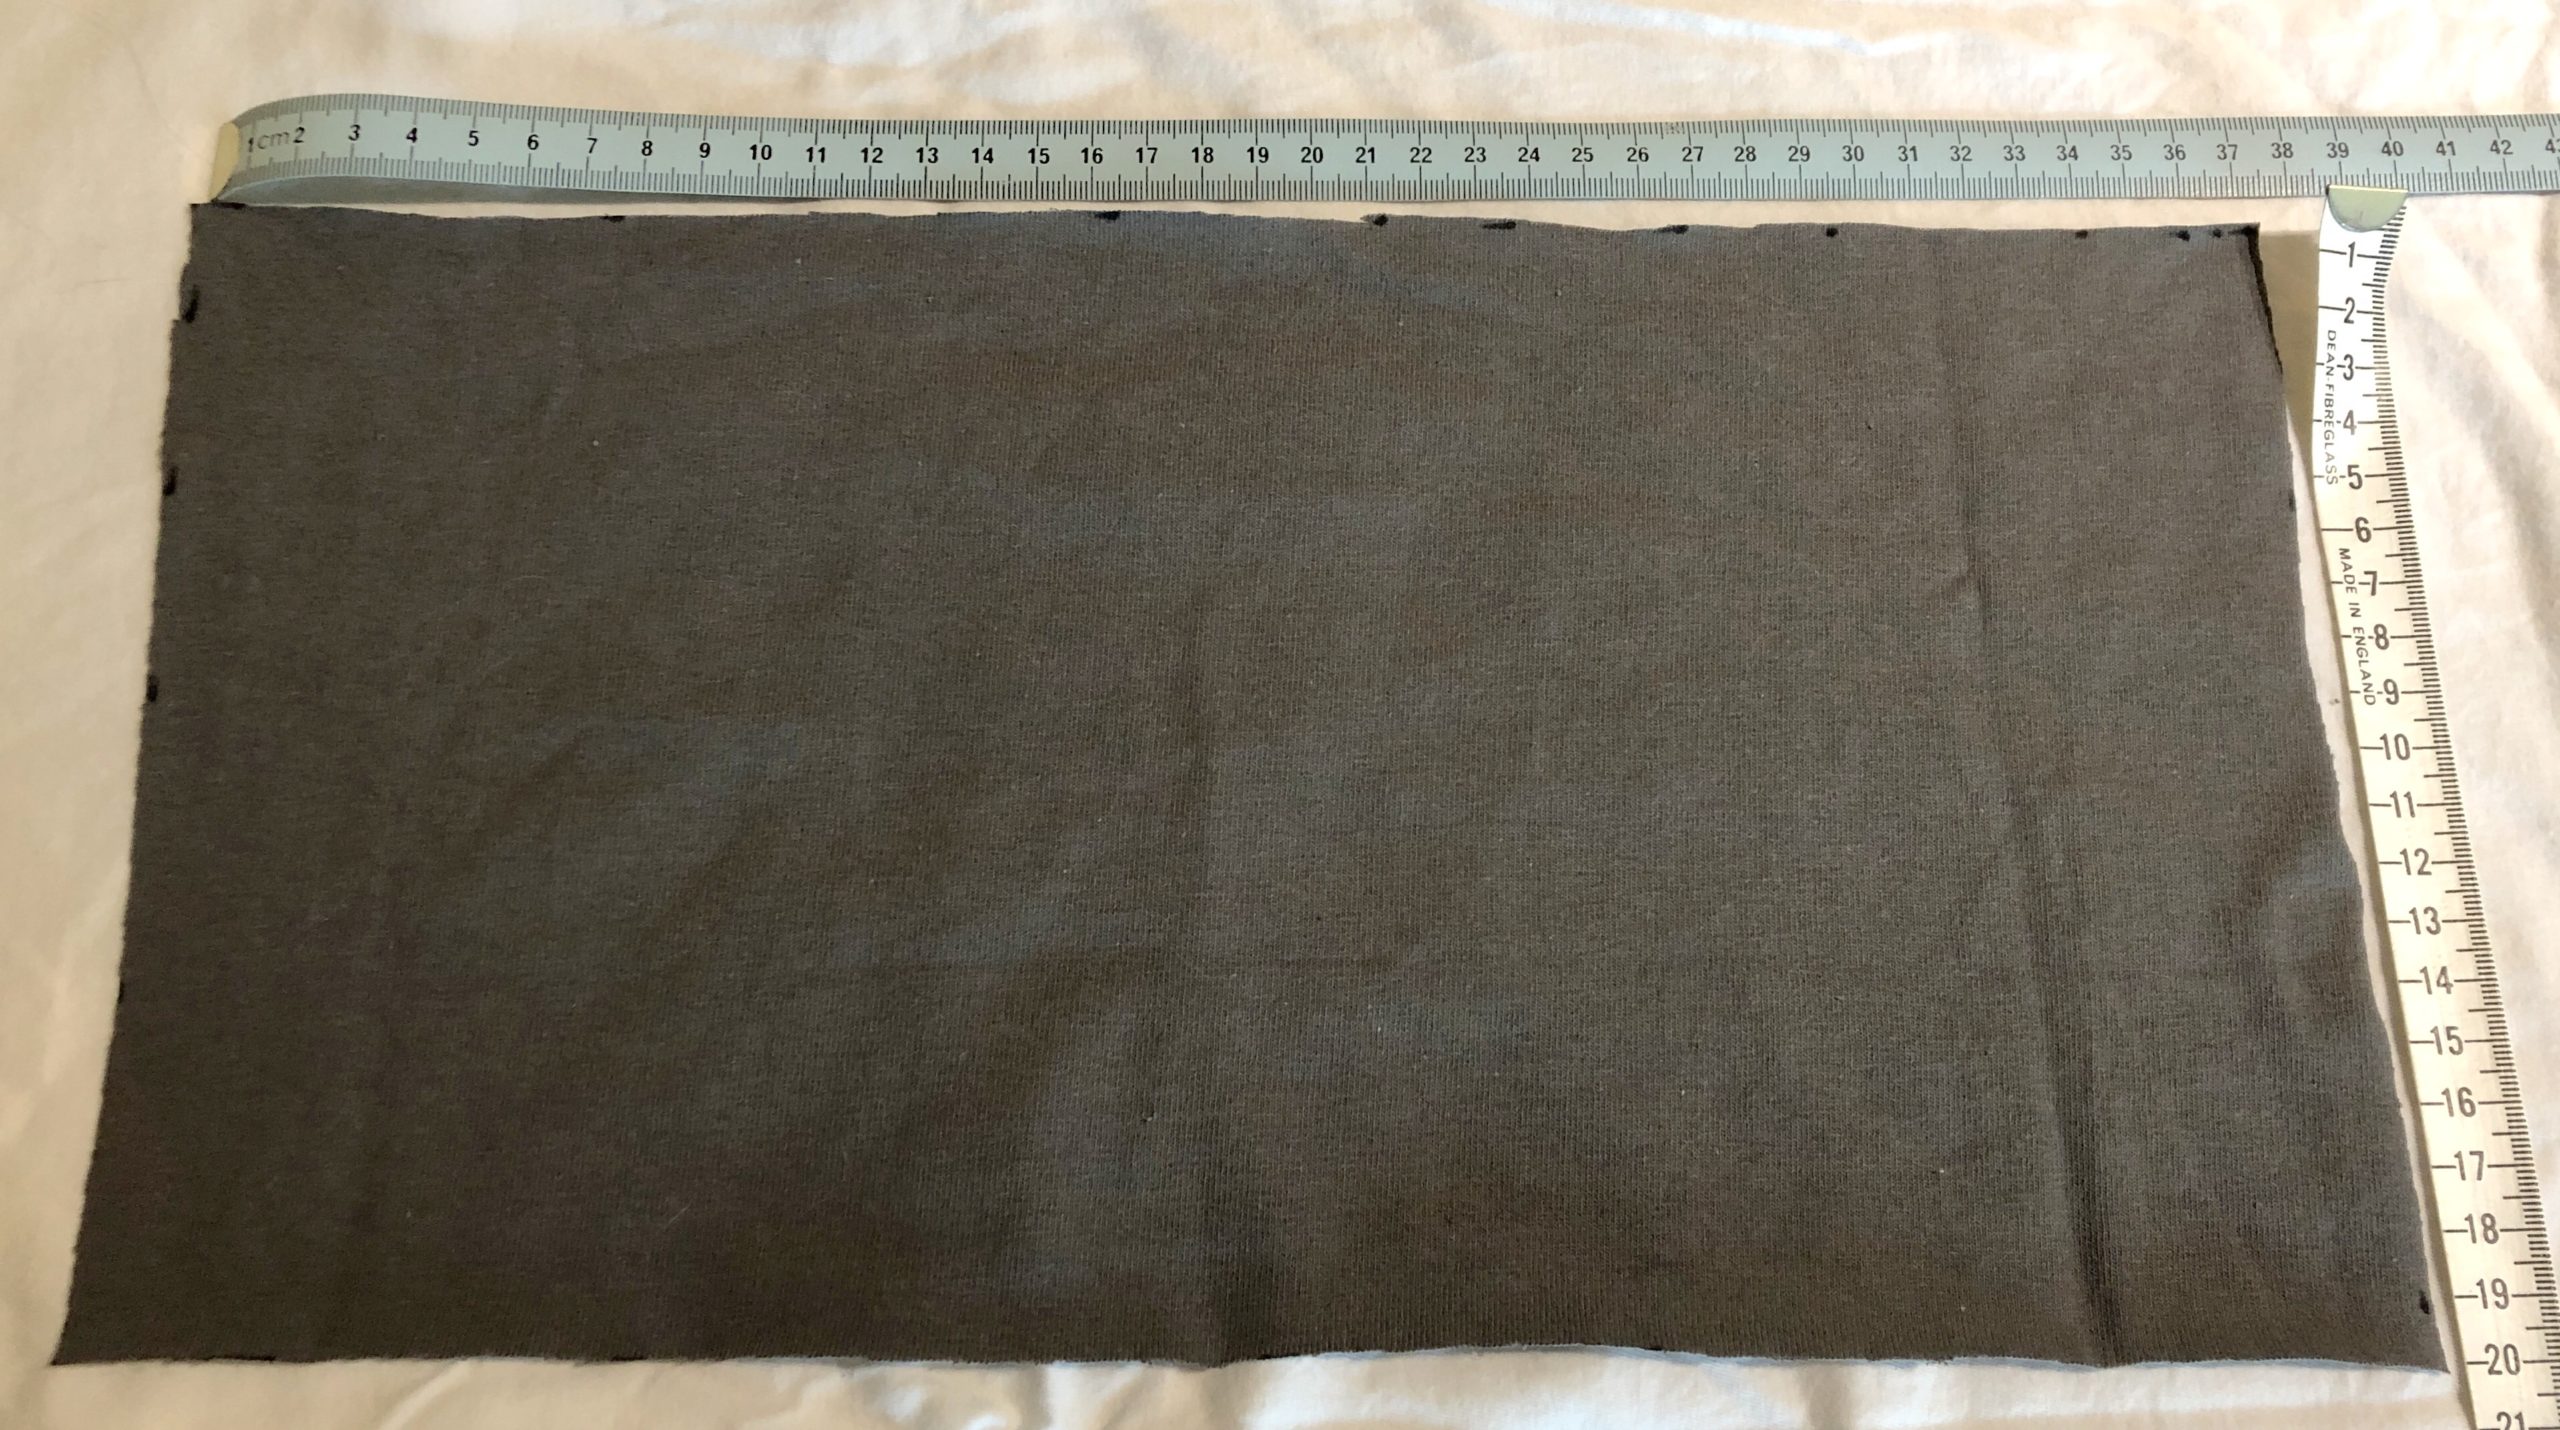
Here’s the fabric pattern: it’s a 20cm by 37cm square cut from a t-shirt. Depending on your t-shirt size, you may get four or five of these out of a single shirt.
If you are using a double-knit material like a t-shirt, then you don’t need to hem the edges because it doesn’t ravel at the edges very much. If you are using a different fabric that will ravel, then cut slightly larger and hem the edges. I like to optimize the process so opted for the t-shirt with no hemming.
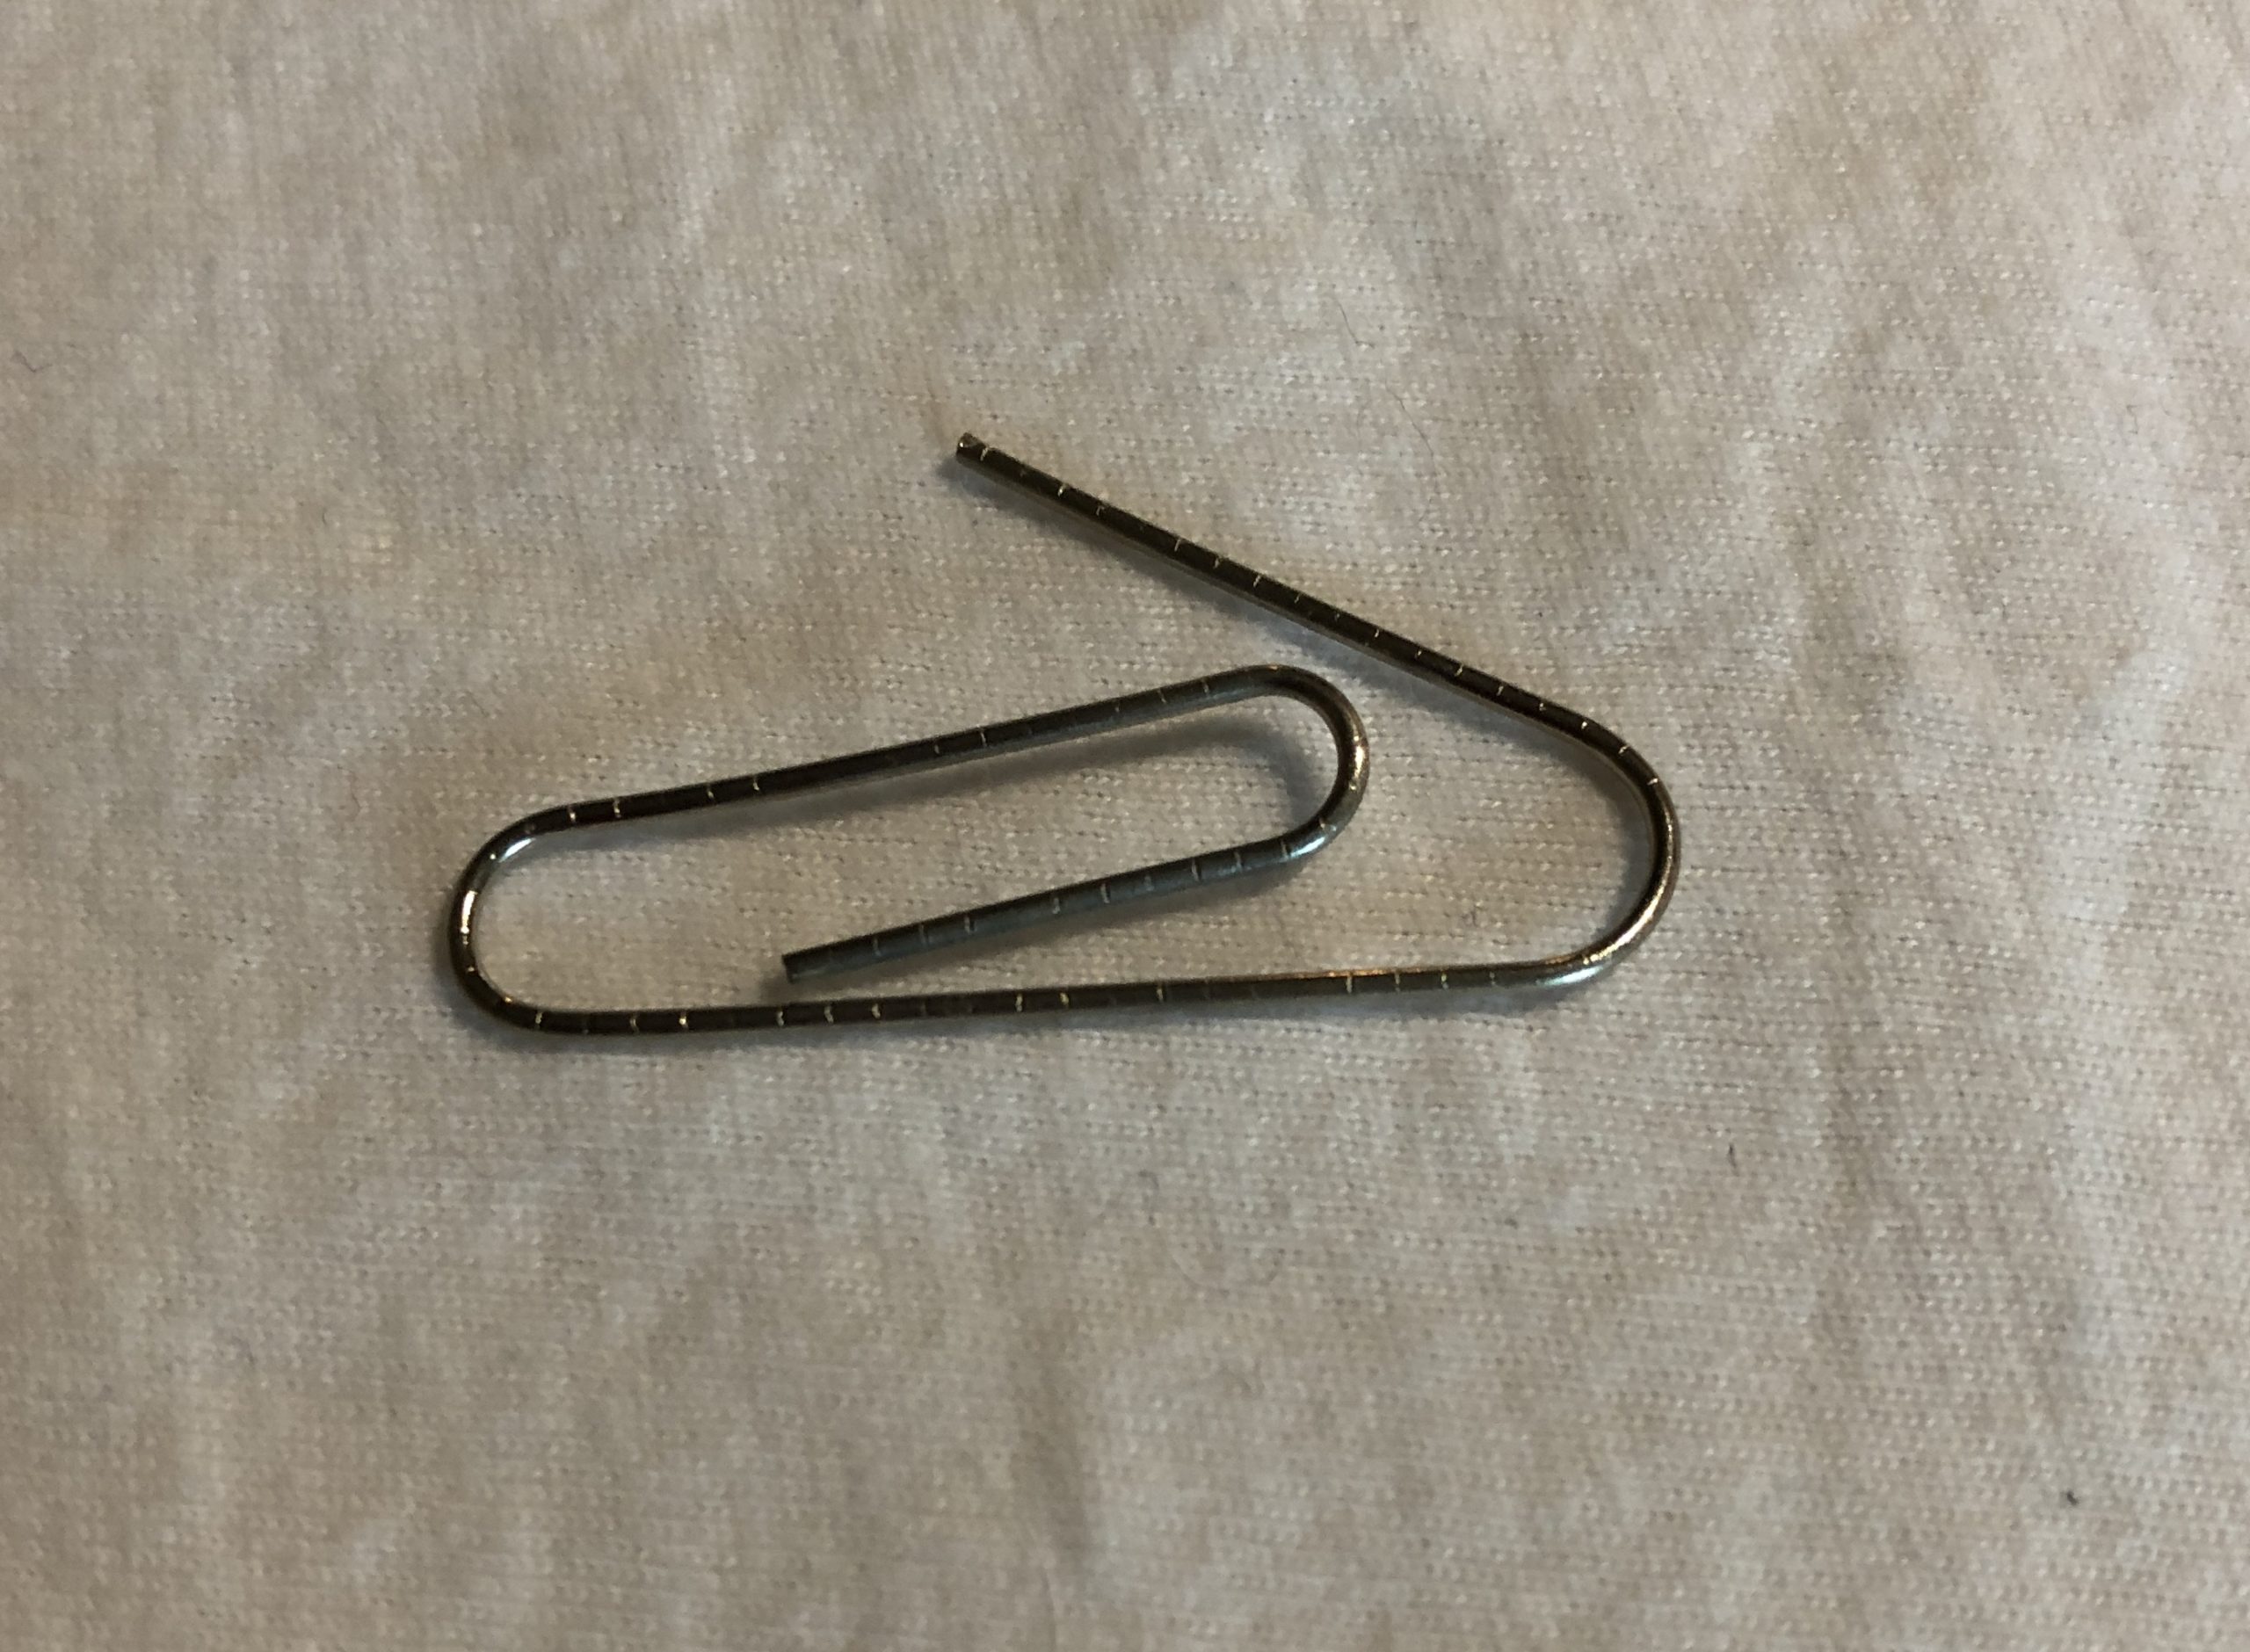 Next is our basic standard-sized paperclip. I don’t have a lot to say about this, expect that the first paperclip version used a larger paperclip and the wire was too stiff to easily bend while adjusting.
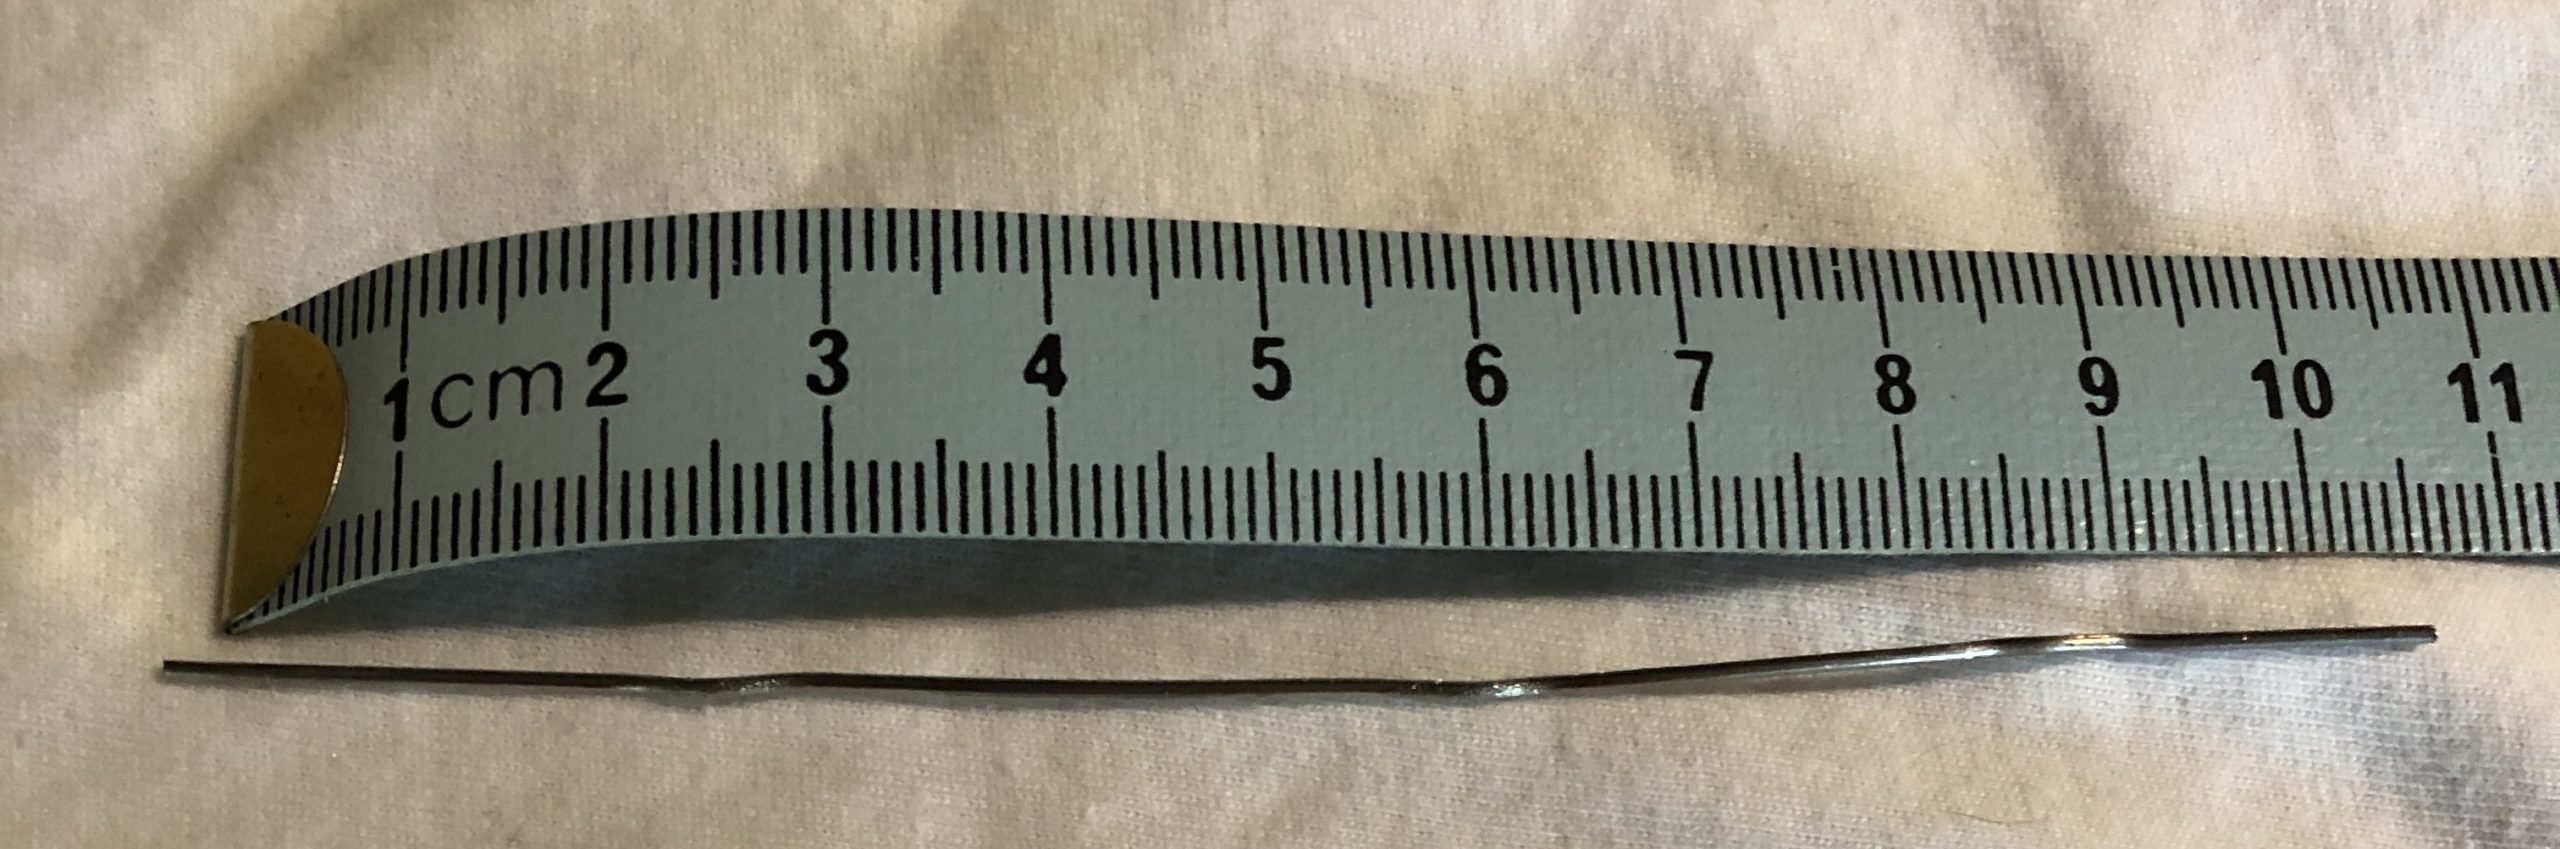 Next thing is to straighten the paperclip. Mine ended up about 10cm long, but plus or minus a centimetre isn’t going to matter.
 Putting the paperclip aside for a moment, here’s how to fold the fabric to prepare for sewing. The 20cm length is the width of the mask from side to side on your face, and the 37cm length allows you to fold it so that the two ends overlap by about 1cm. In this case, I’ve overlapped by about 1.5cm, which means that the total height of the mask is 17cm, or 37/2 – 1.5.
I used these measurements because they fit both myself and my husband, so likely work for most adults. If you’re making a mask for a child, measure across their face from cheekbone to cheekbone to replace the 20cm measurement, then measure from the top of their nose to well under their chin, double it and add a centimeter to replace the 37cm measurement.
 This next part is a bit tricky, and hard to see in the photos.
This is where we sew the paperclip into the top fold of the mask to create a bendable nose clip. What you’re seeing on the right is the fold at the top of the mask with the straightened paperclip rolled right up into the fold.
 To prepare for sewing, I pinned the fabric below the paperclip, pushing the paperclip right into the inside of the fold. In the photo on the left, the paperclip is inside the folded material above the pins.
Now we move to the sewing machine, although this could be done by hand-stitching through the edge of the fabric and around the paperclip. 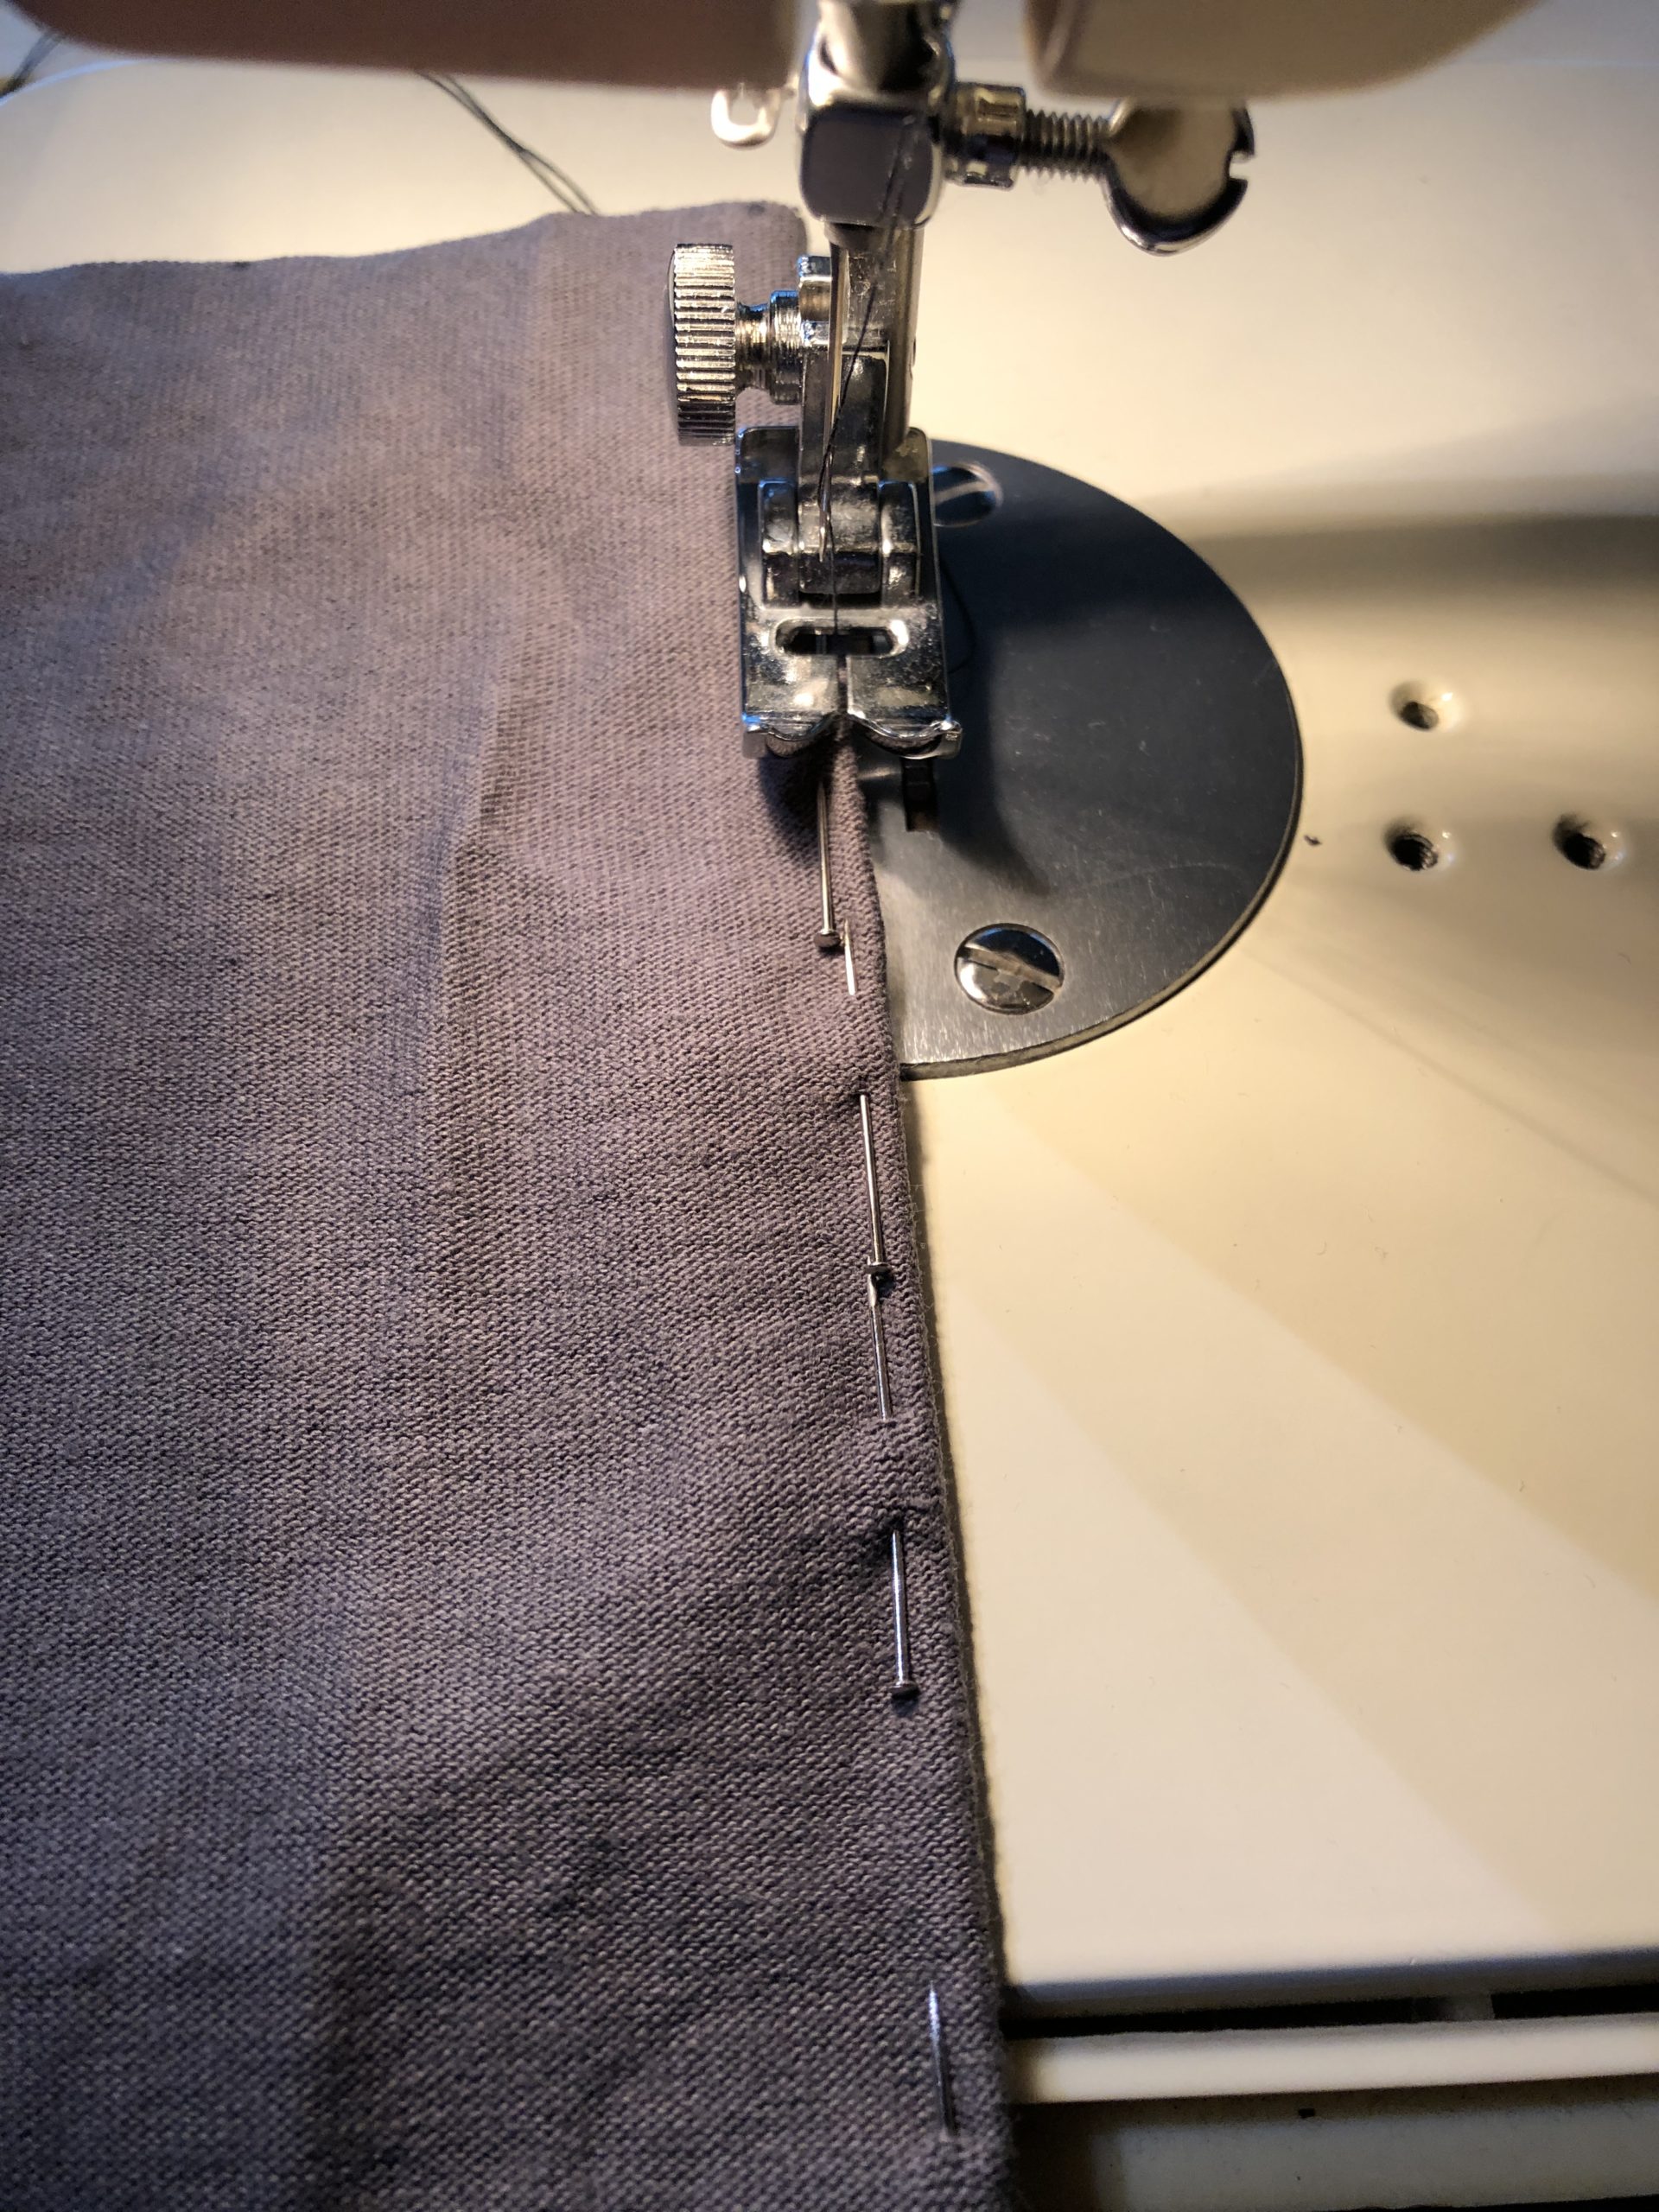 In fact, after having done this a few times, I think that hand-sewing may be easier, since the feed mechanism on most home machines don’t work well when you have something stiff like a paperclip inside your fabric.
If you’re using a sewing machine, put on the zigzag foot and set the width of the stitch to as wide as it will go, so that the two sides of the zigzag stitches will go on either side of the paperclip. Start sewing and guide it through so that the fabric-covered paperclip tucked into the fold is in the centre, and the zigzag stitches go to either side of it: first to the left on the main part of the fabric, and then to the right where there is no fabric but the stitch will close around it.
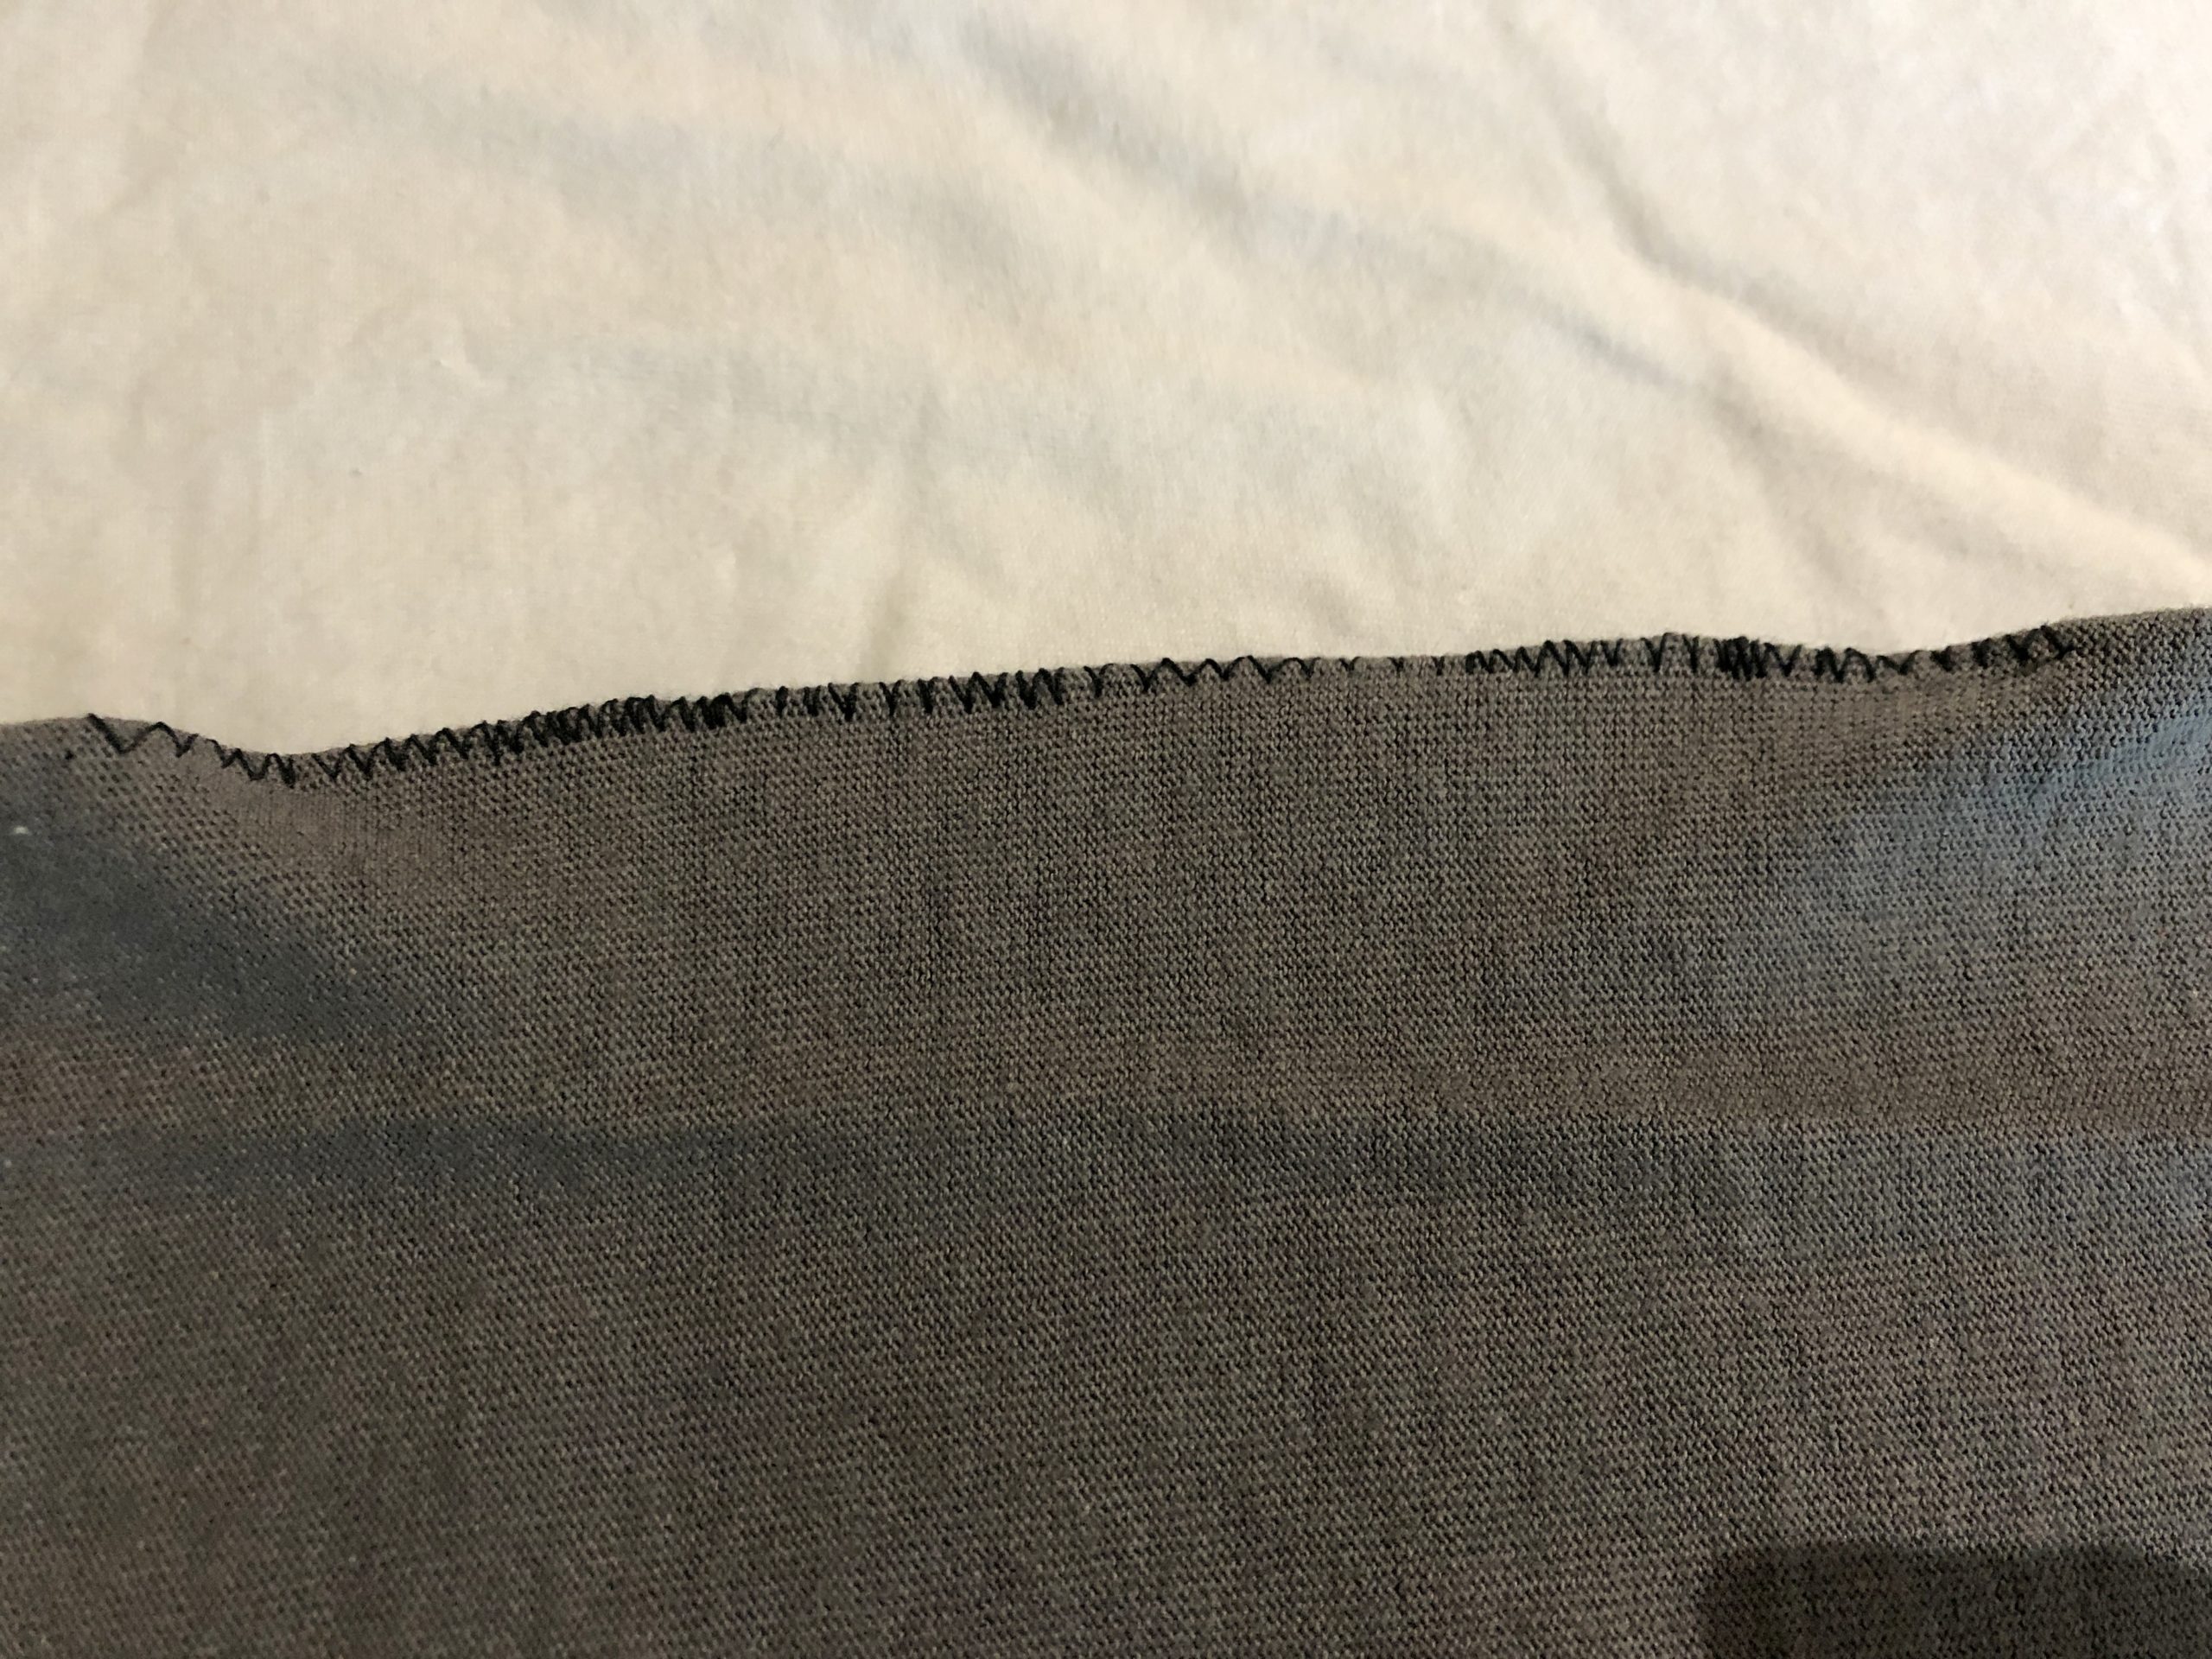 That may not have been the best explanation, but here’s what you end up with. The straightened paperclip is inside the fold at the top of the fabric, and the zigzag stitches go to either side of it, which completely encloses the paperclip with fabric.
If you have fabric glue, you could definitely try that to hold the paperclip in place instead, although I haven’t tried that. You could also, as I mentioned before, hand-sew it into place.
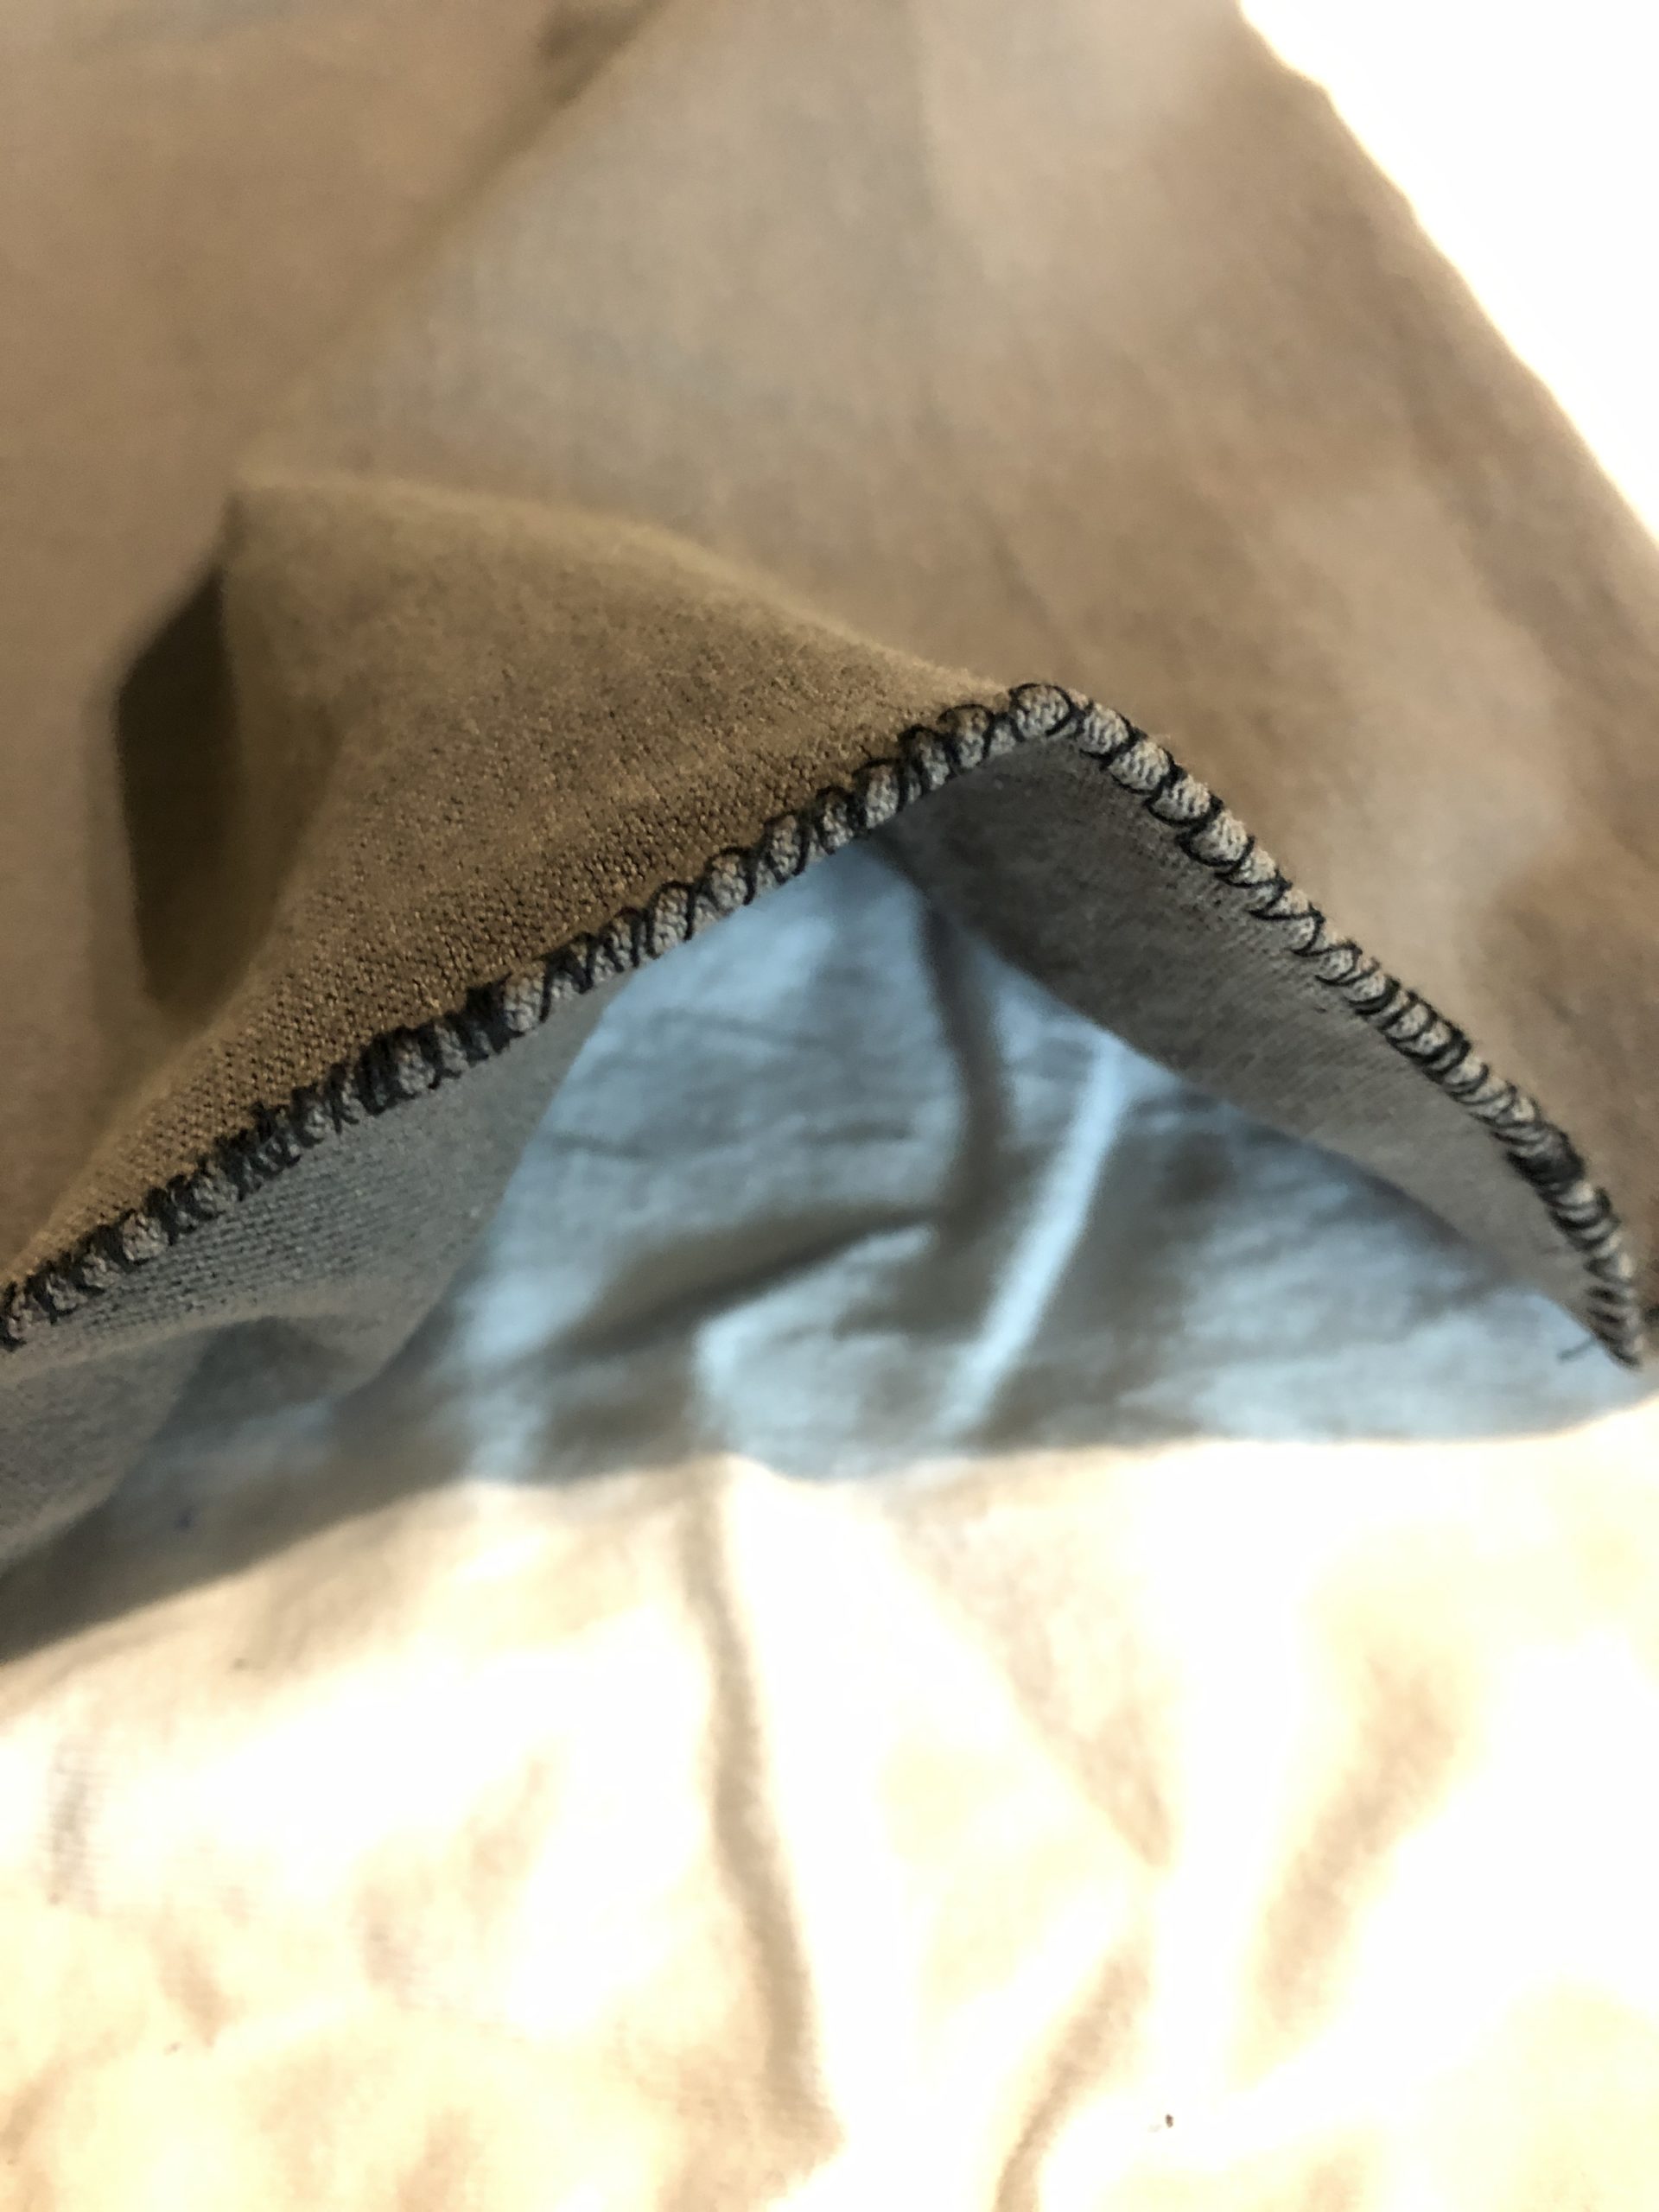 And here’s why we went to all that work: a bendable nose clip. This is looking from the top of the mask, so you can see that the paperclip is completely sewn into the fold of the fabric, and when you bend the paperclip, it’s going to let you mold it to fit your own nose.
 Now here’s what you have, and the hard part is over. You have the folded fabric like we saw earlier, with a straightened paperclip sewn inside the top fold. Lay out your fabric like this again for the next steps.
Adding ties and stitching sides
We’re now going to add ties and stitch the sides to create the mask. I used a sewing machine, but you could do all of this with hand sewing, or you could some type of craft adhesive such as a hot glue gun or fabric glue. 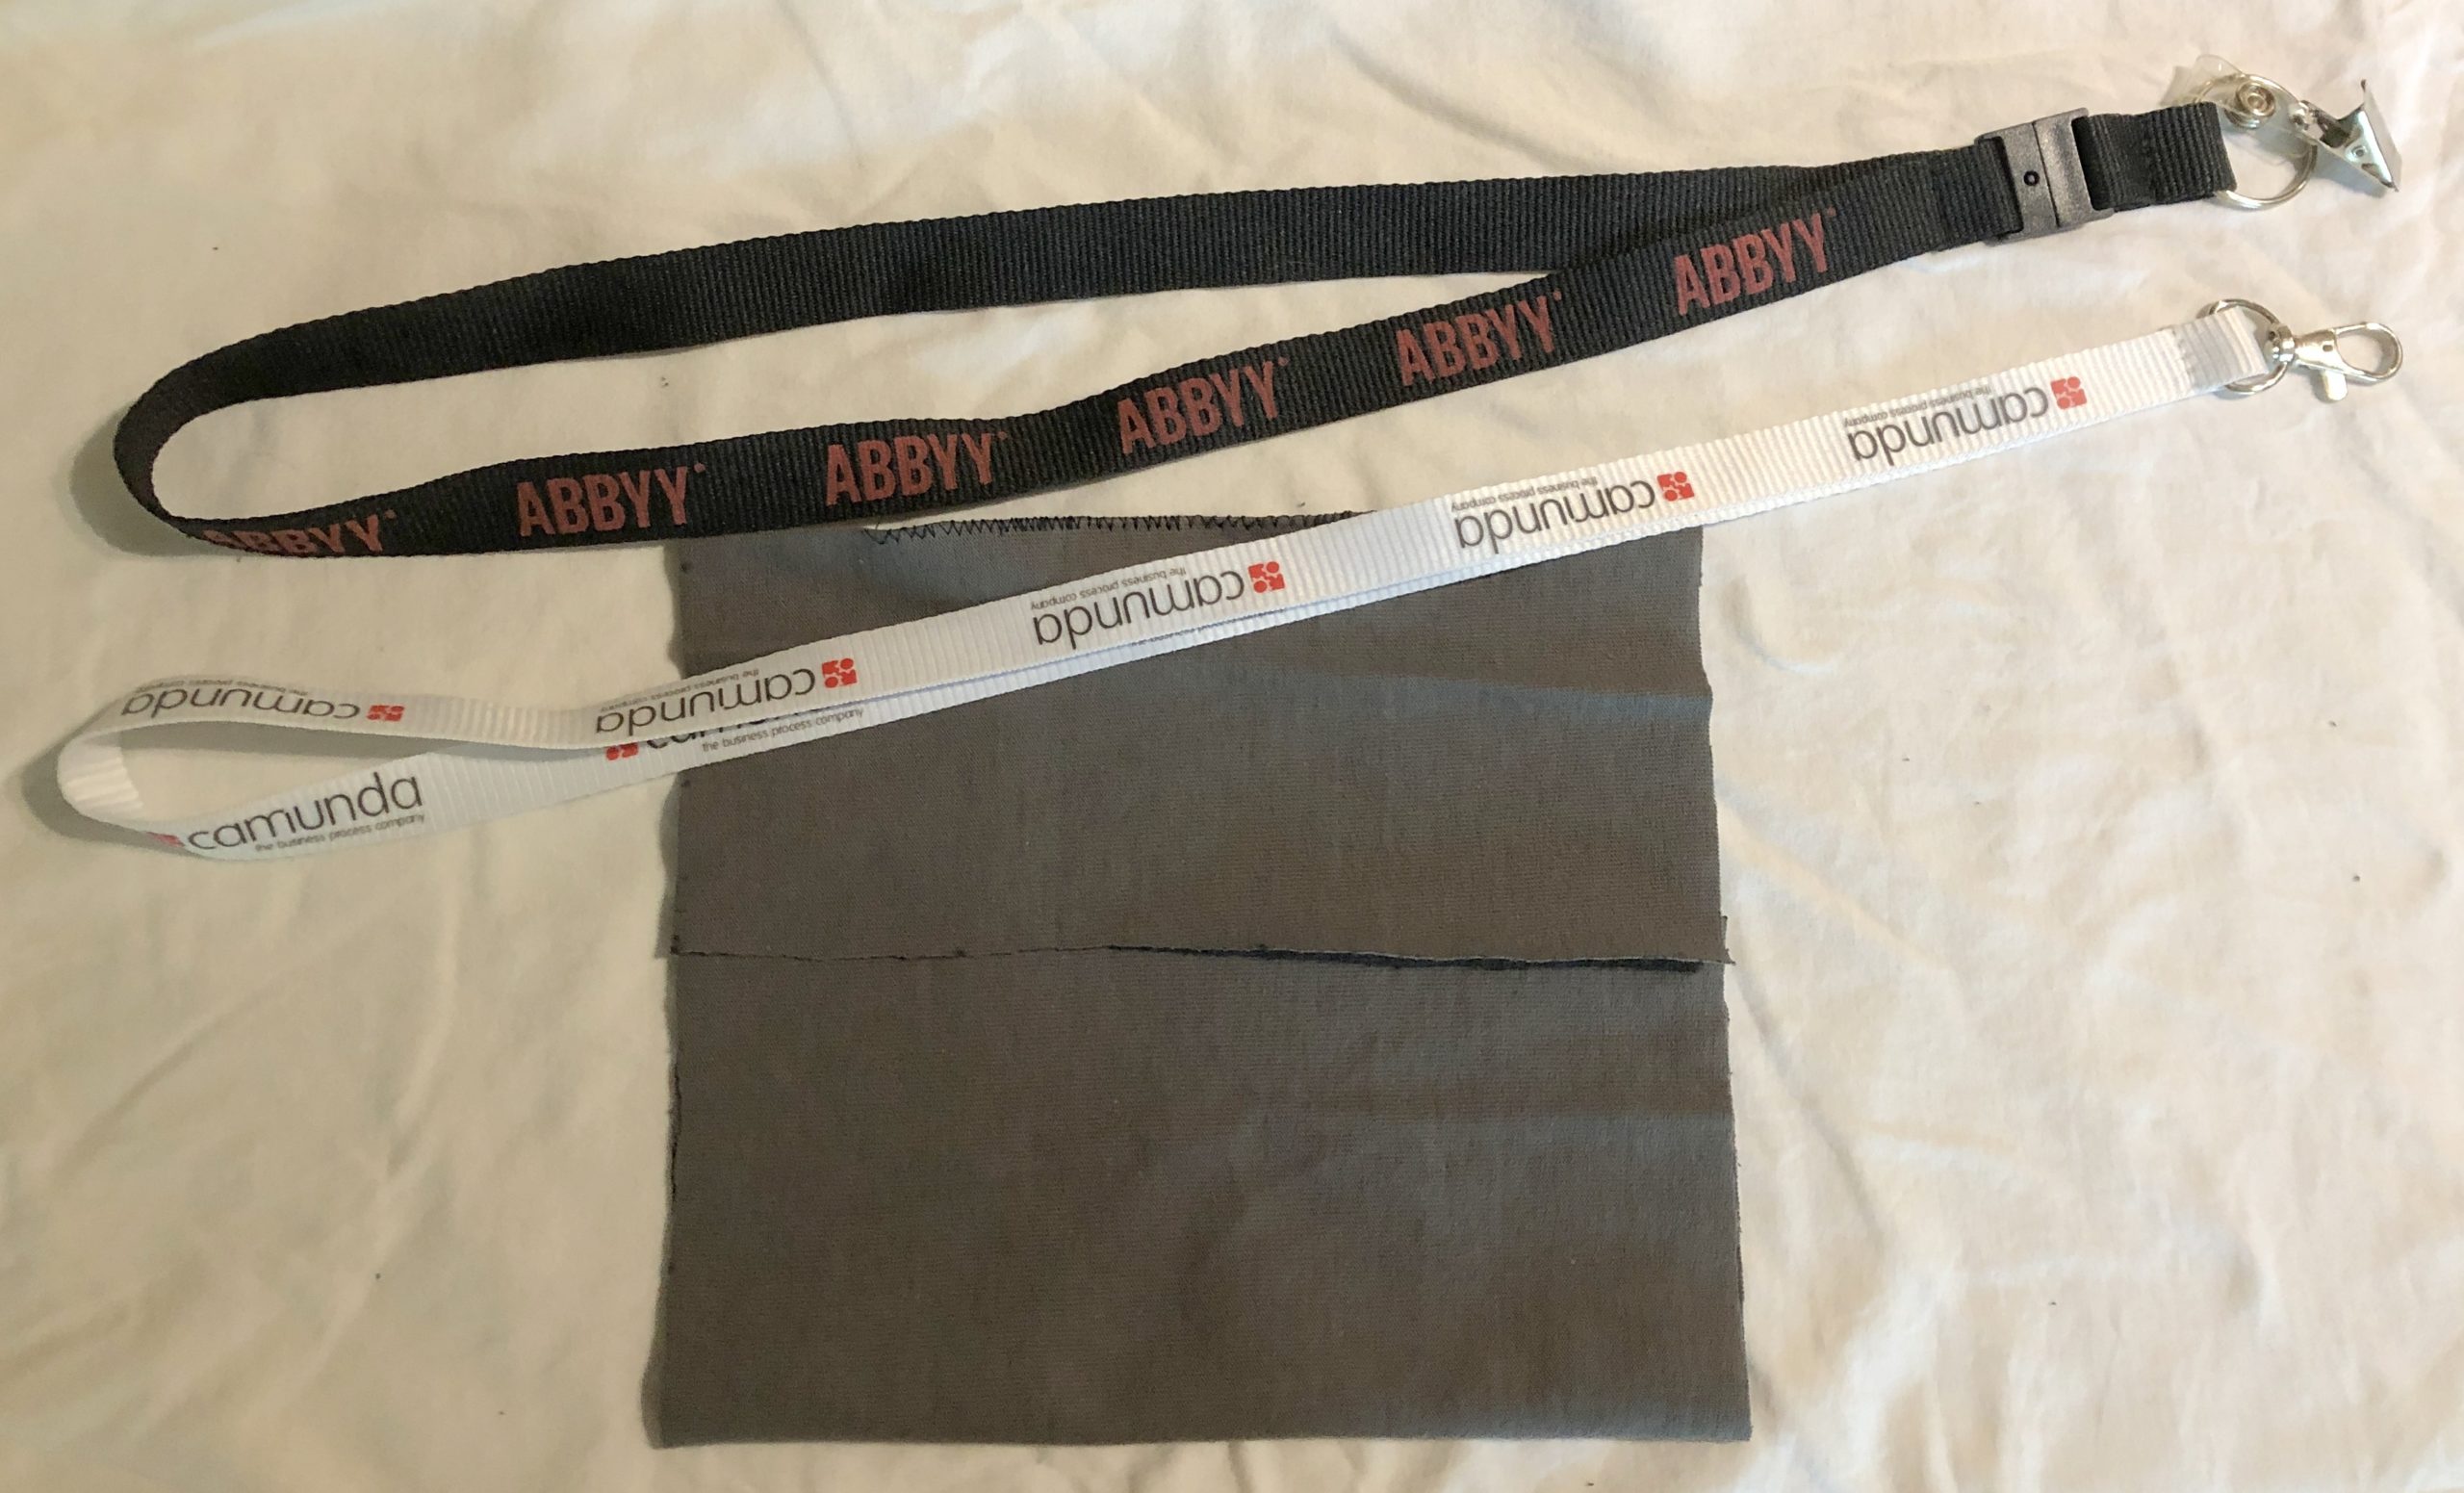 You could even staple it together, although if you opt for that, make sure that the smooth (top) side of the staples are facing inwards so that they don’t scratch your face.
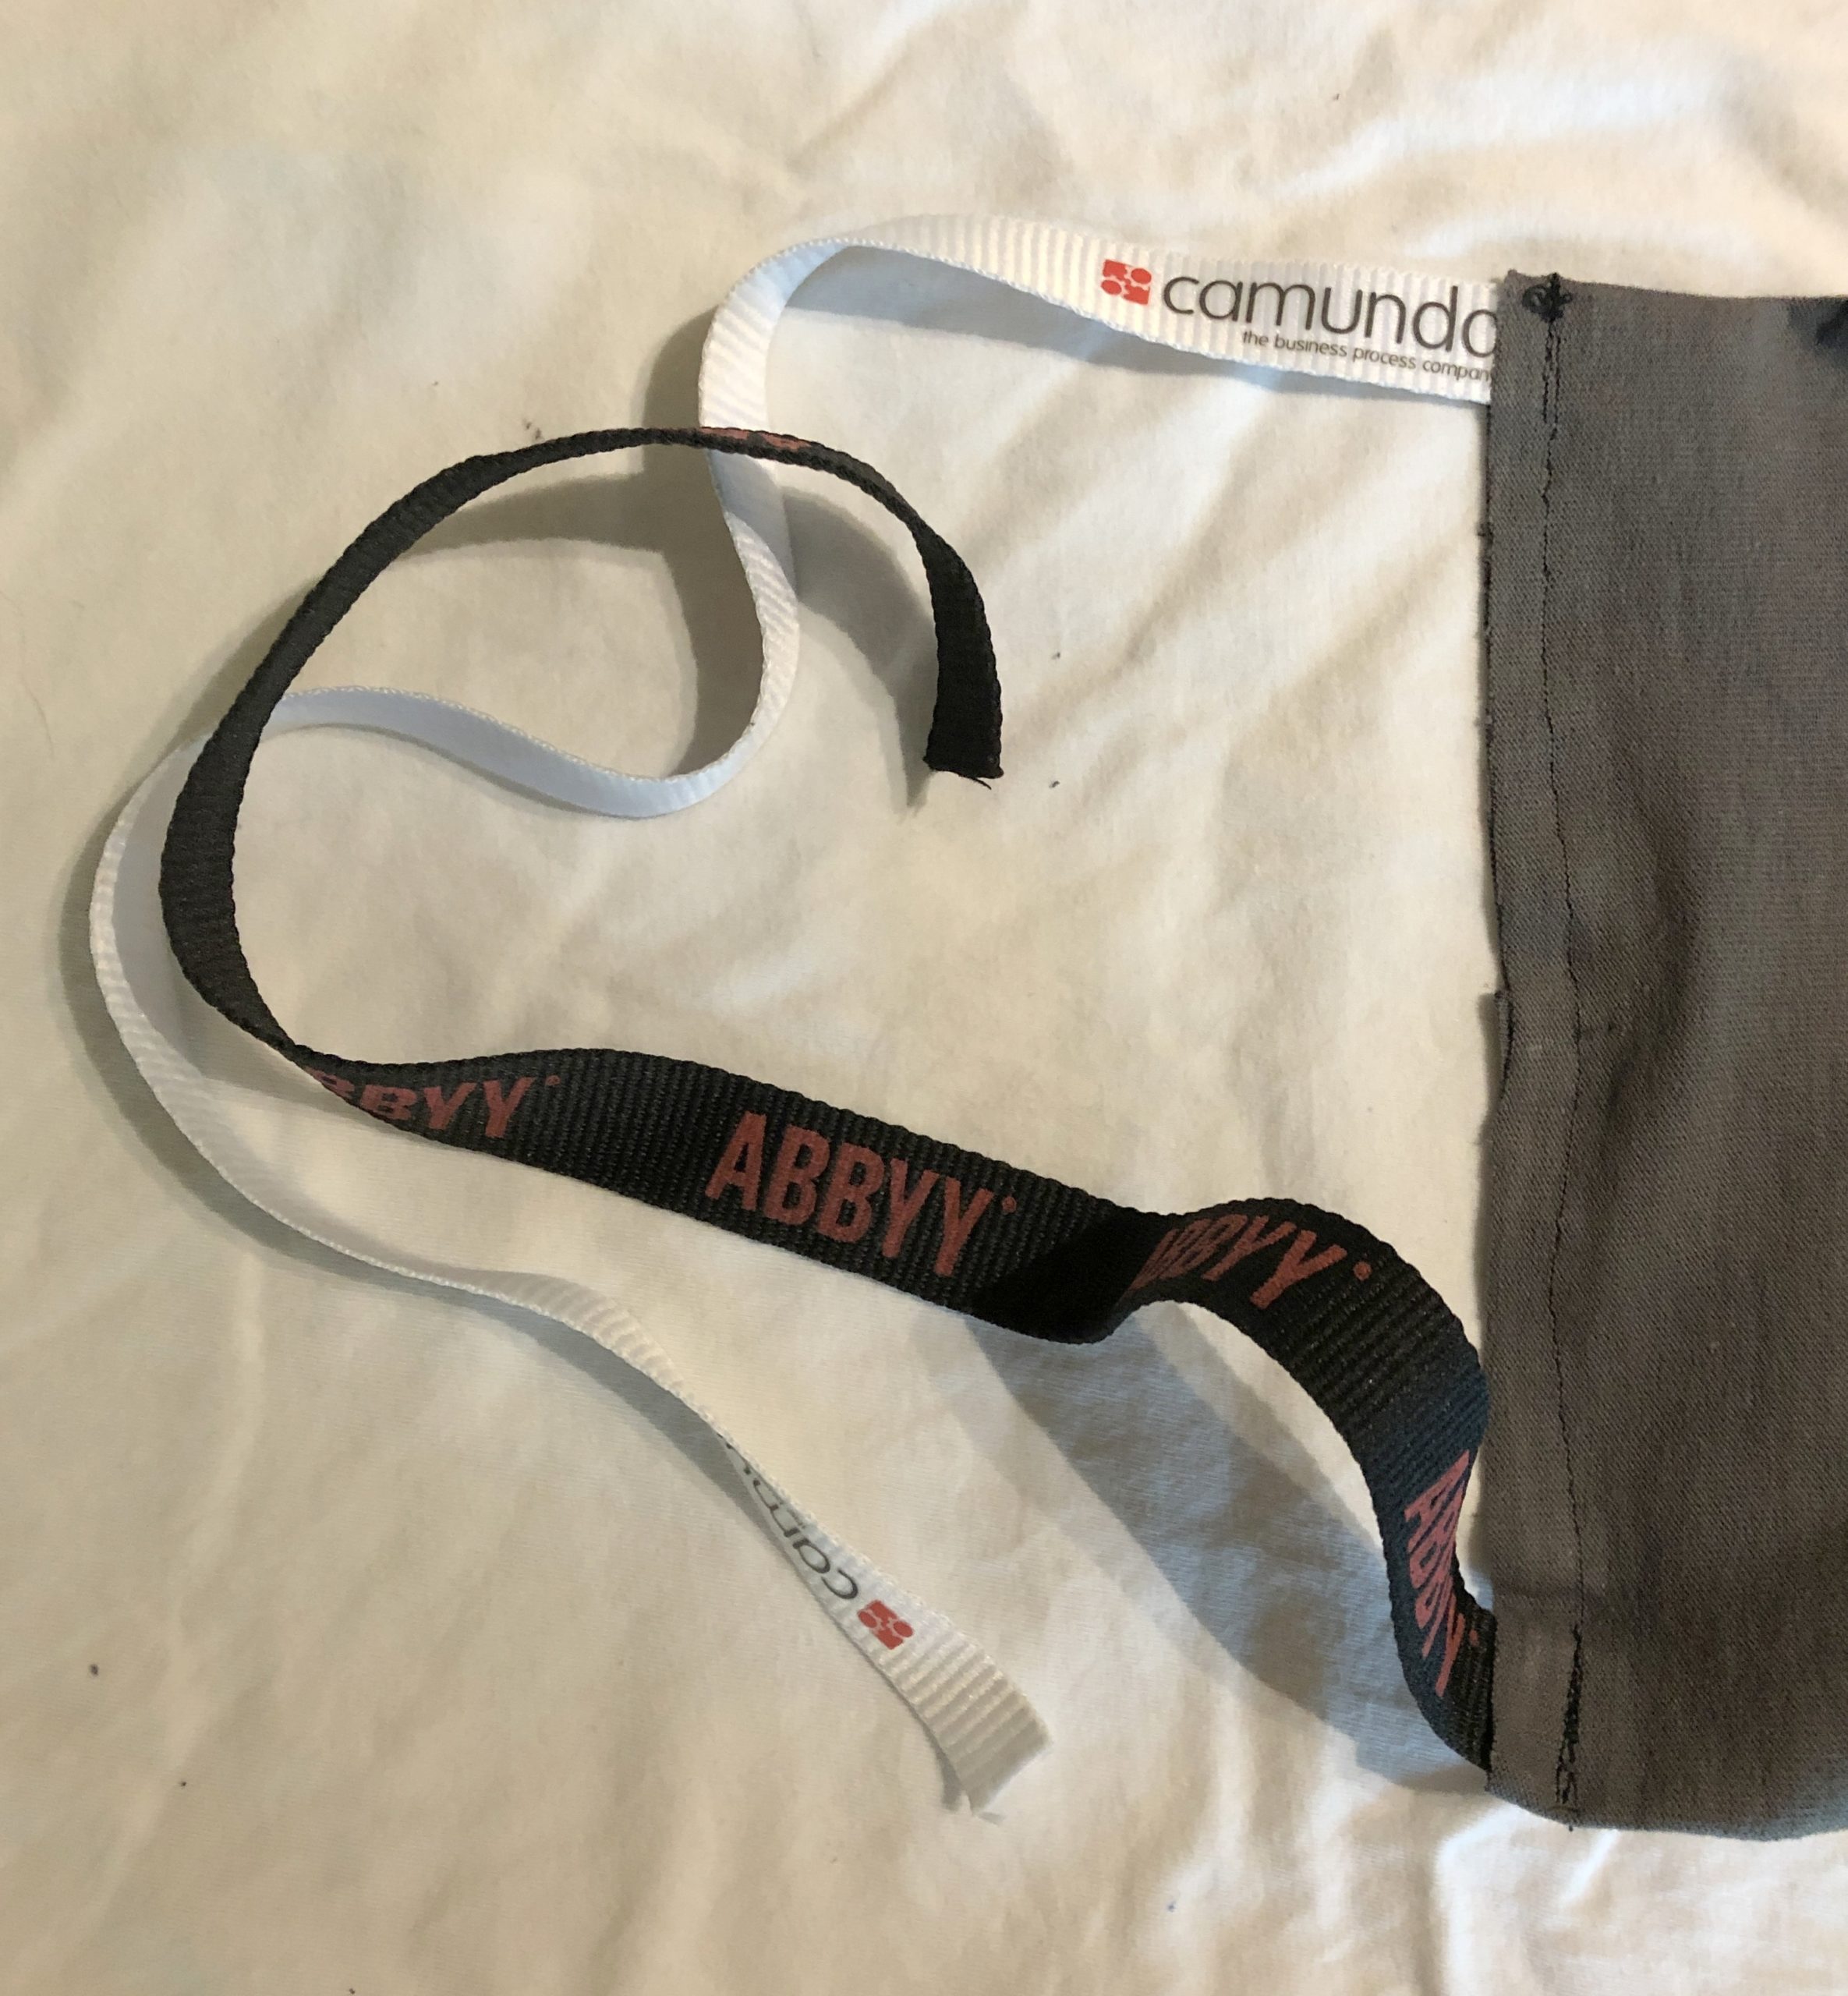
Here’s where the conference lanyards come in: who doesn’t have a couple of these hanging around? You’ll need two of them, and I’ve selected two from past vendor clients of mine where I’ve also attended their conferences: Camunda and ABBYY. Thanks guys!
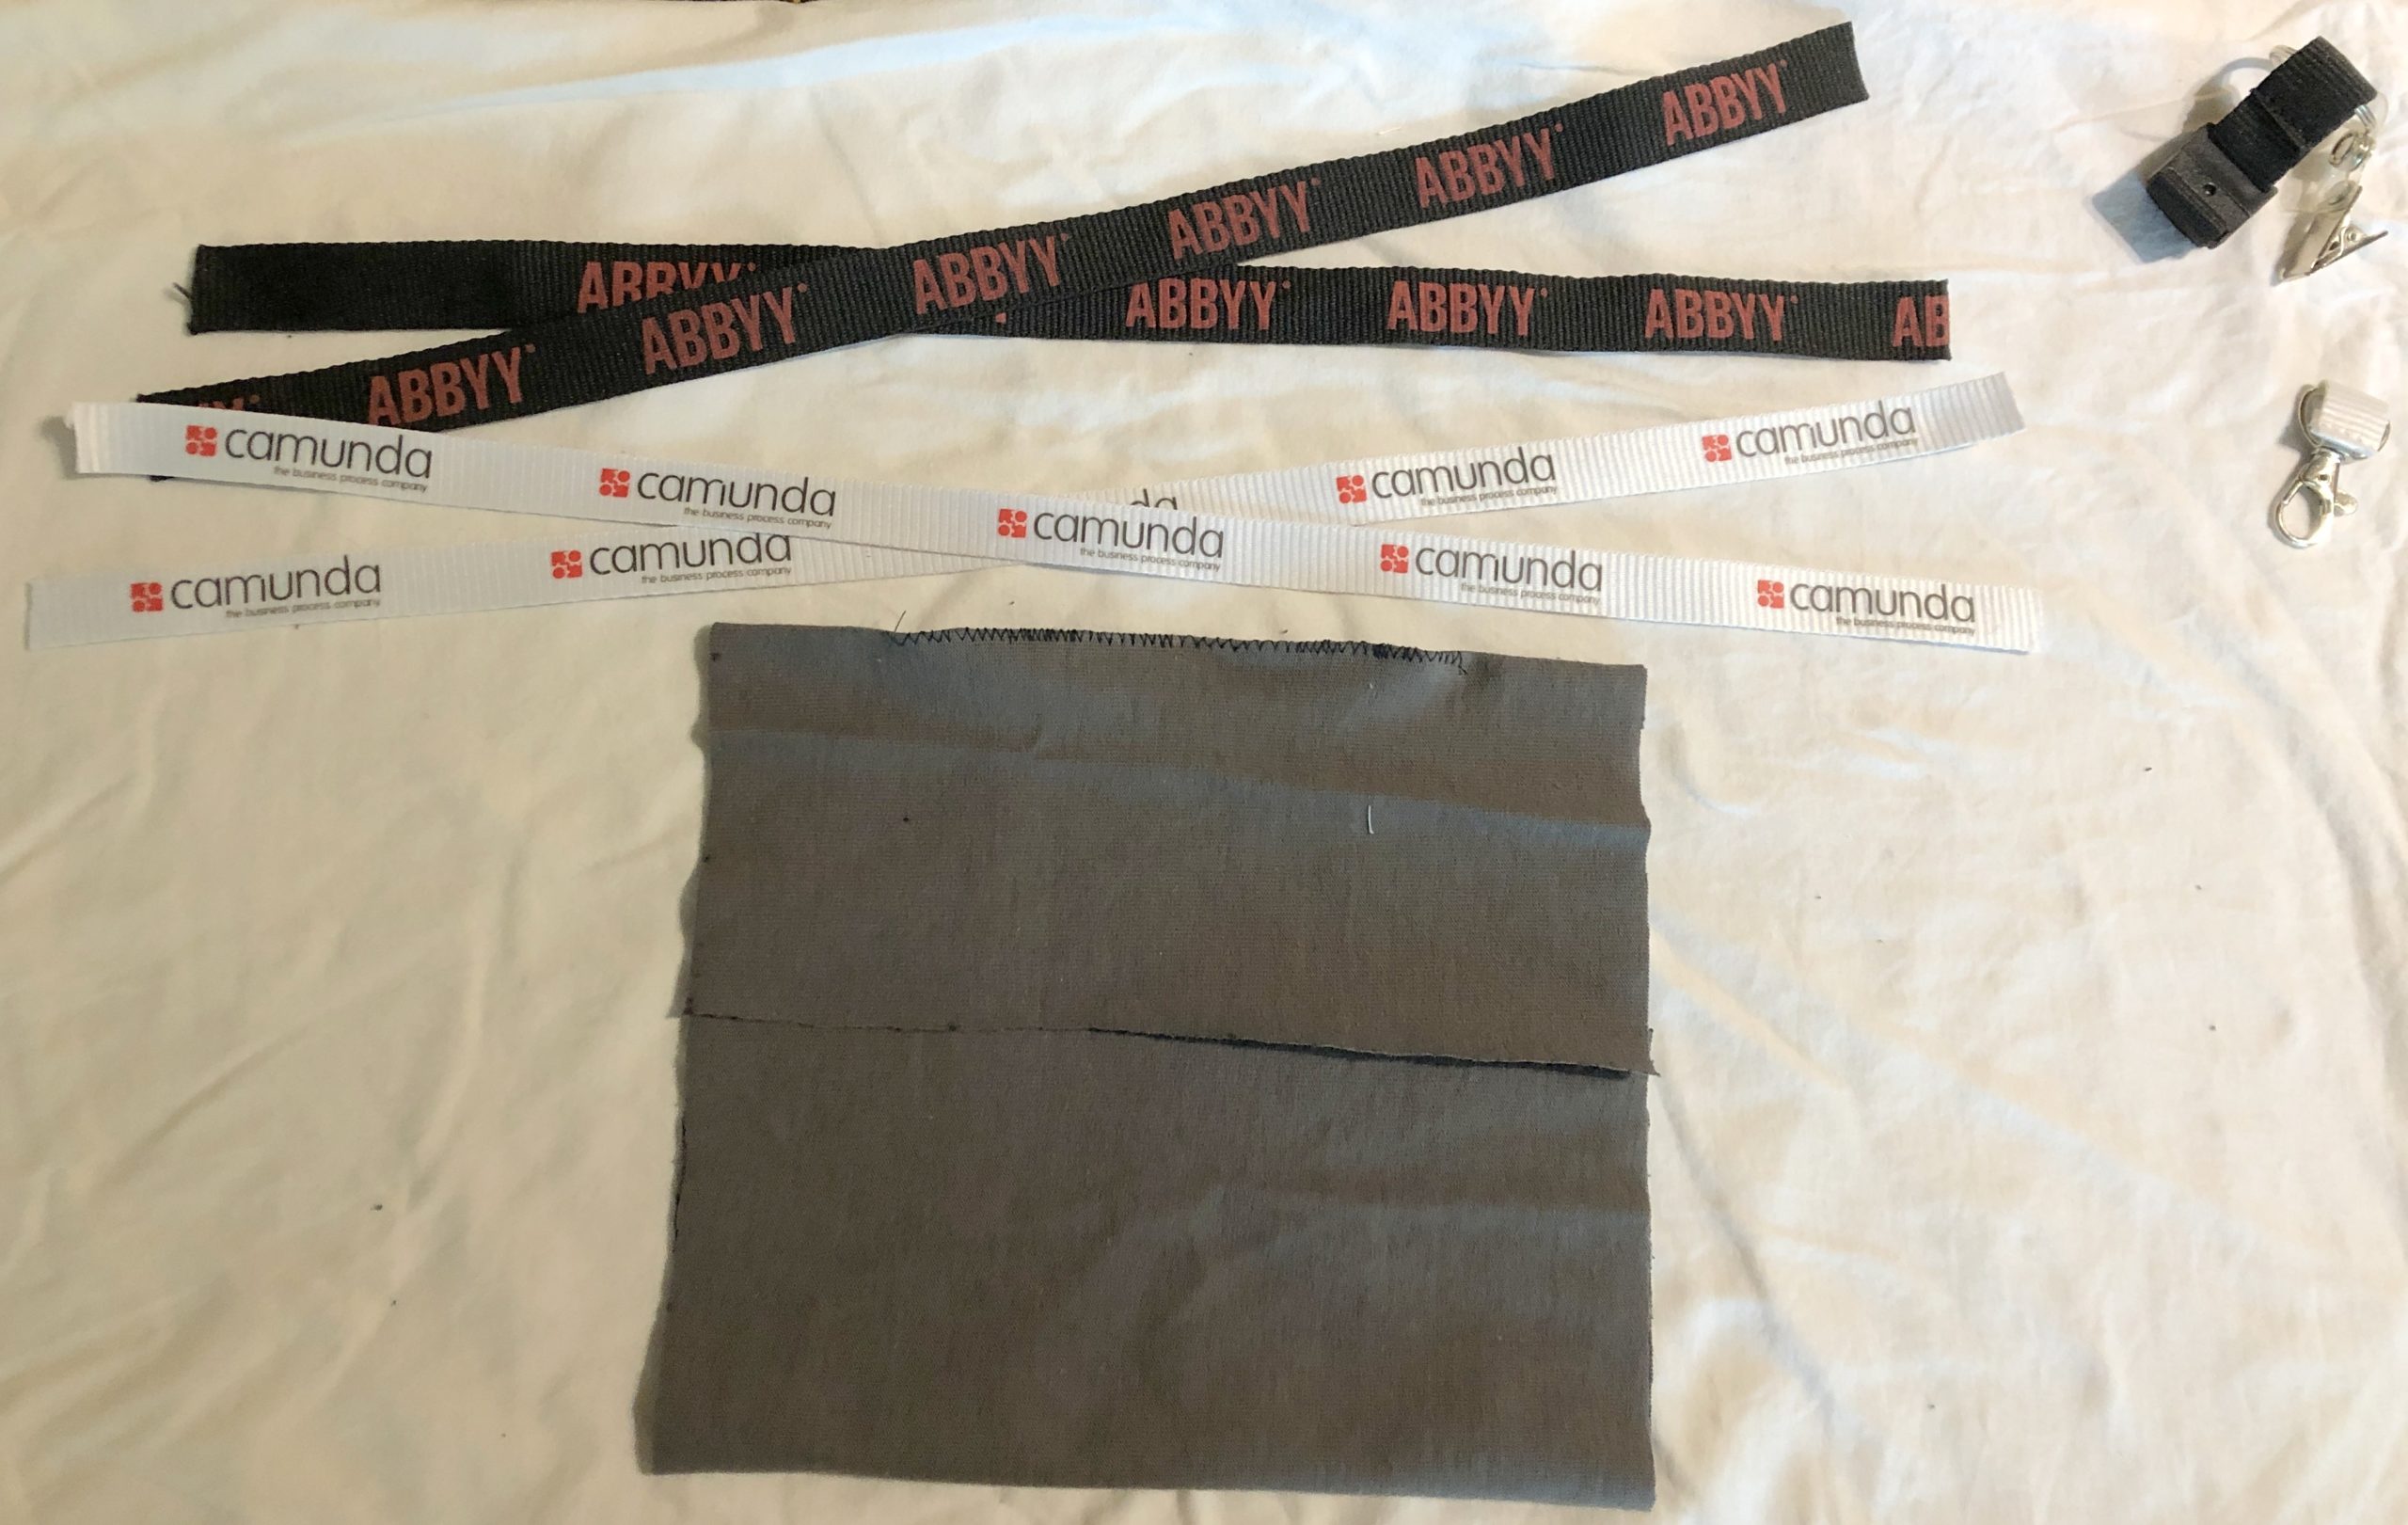 Cut off all that cool stuff at the end of the lanyard and throw it away. Cut each lanyard in half. These will be the four ties that attach to each corner of the mask, and tie behind your head. If one set is slightly longer than the other, use it at the top of the mask since it’s a bit further around the back of your head than around your neck where the other one ties.
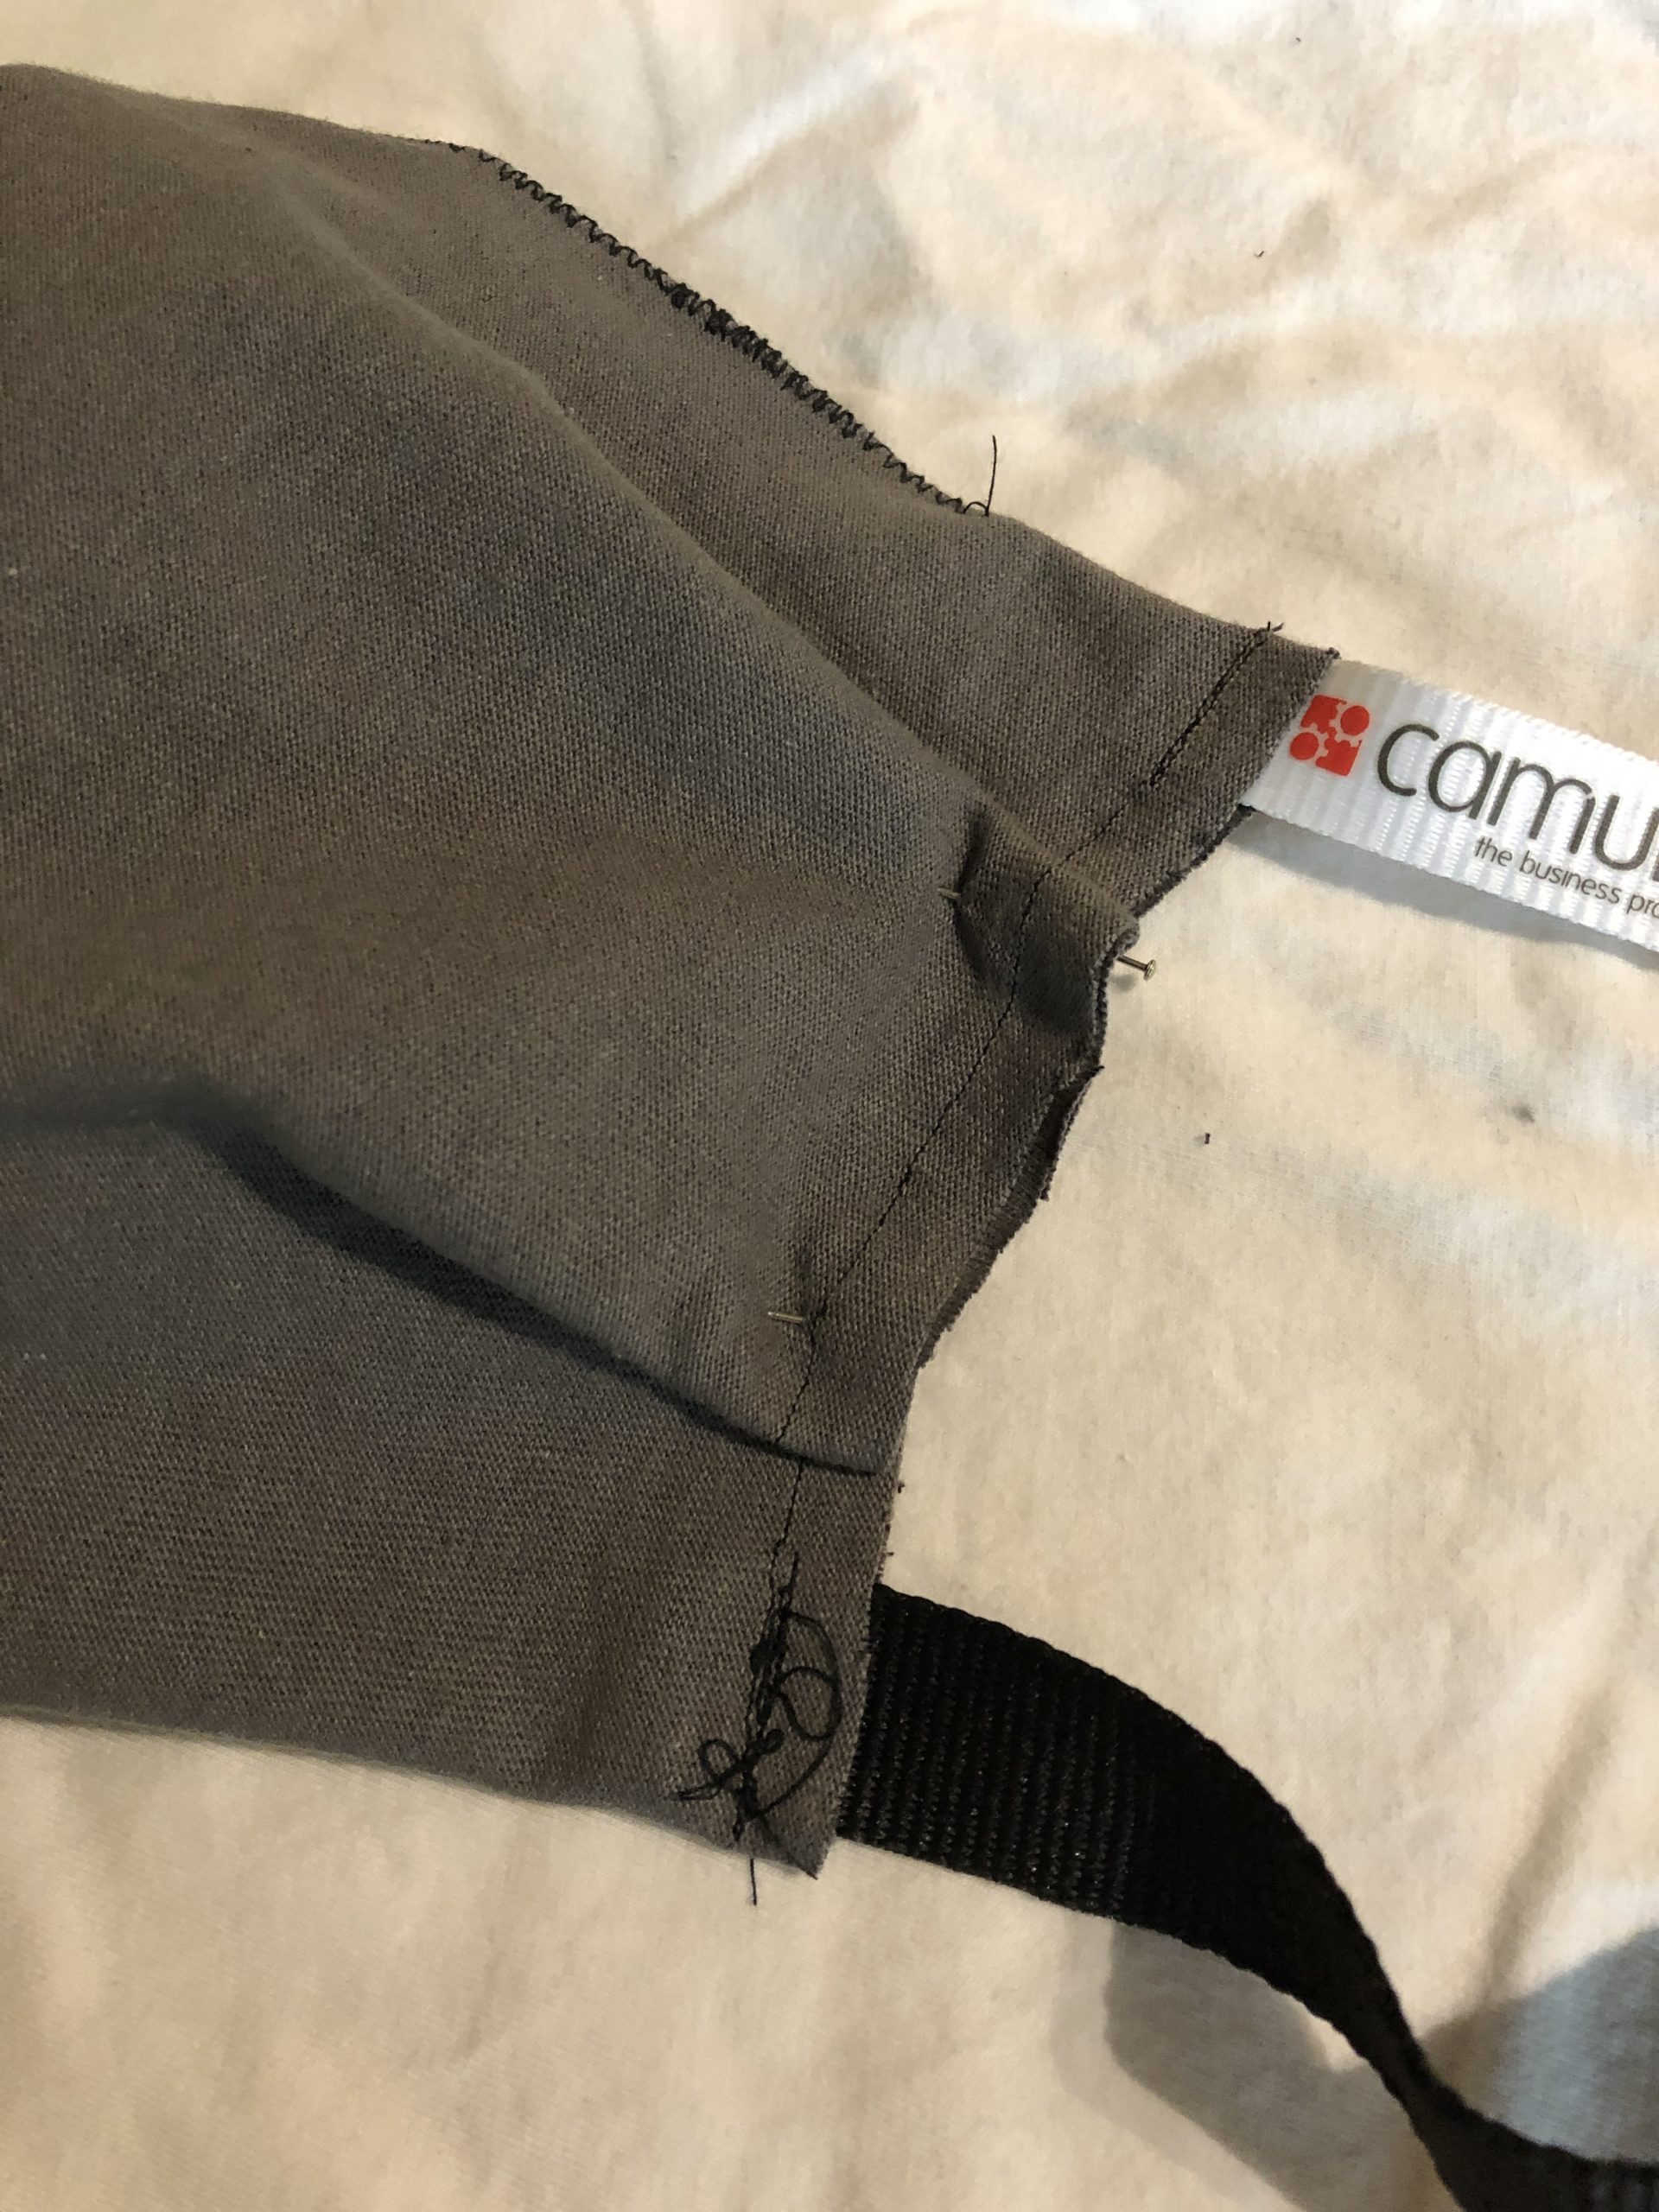
 To prepare for sewing the edges I’ve started with the right side, and you’re looking at it from the back side, that is, the side that will touch your face. Slide about 1 or 1.5cm of the tie into the fold of the fabric (that is, between the layers) at the top and bottom, and pin in place. I made mine so that the logos on the ties are facing out and right-side up when the mask is on, but the choice is yours.
 Also put a pin where the fabric overlaps in the middle of that edge to hold it in place while sewing.
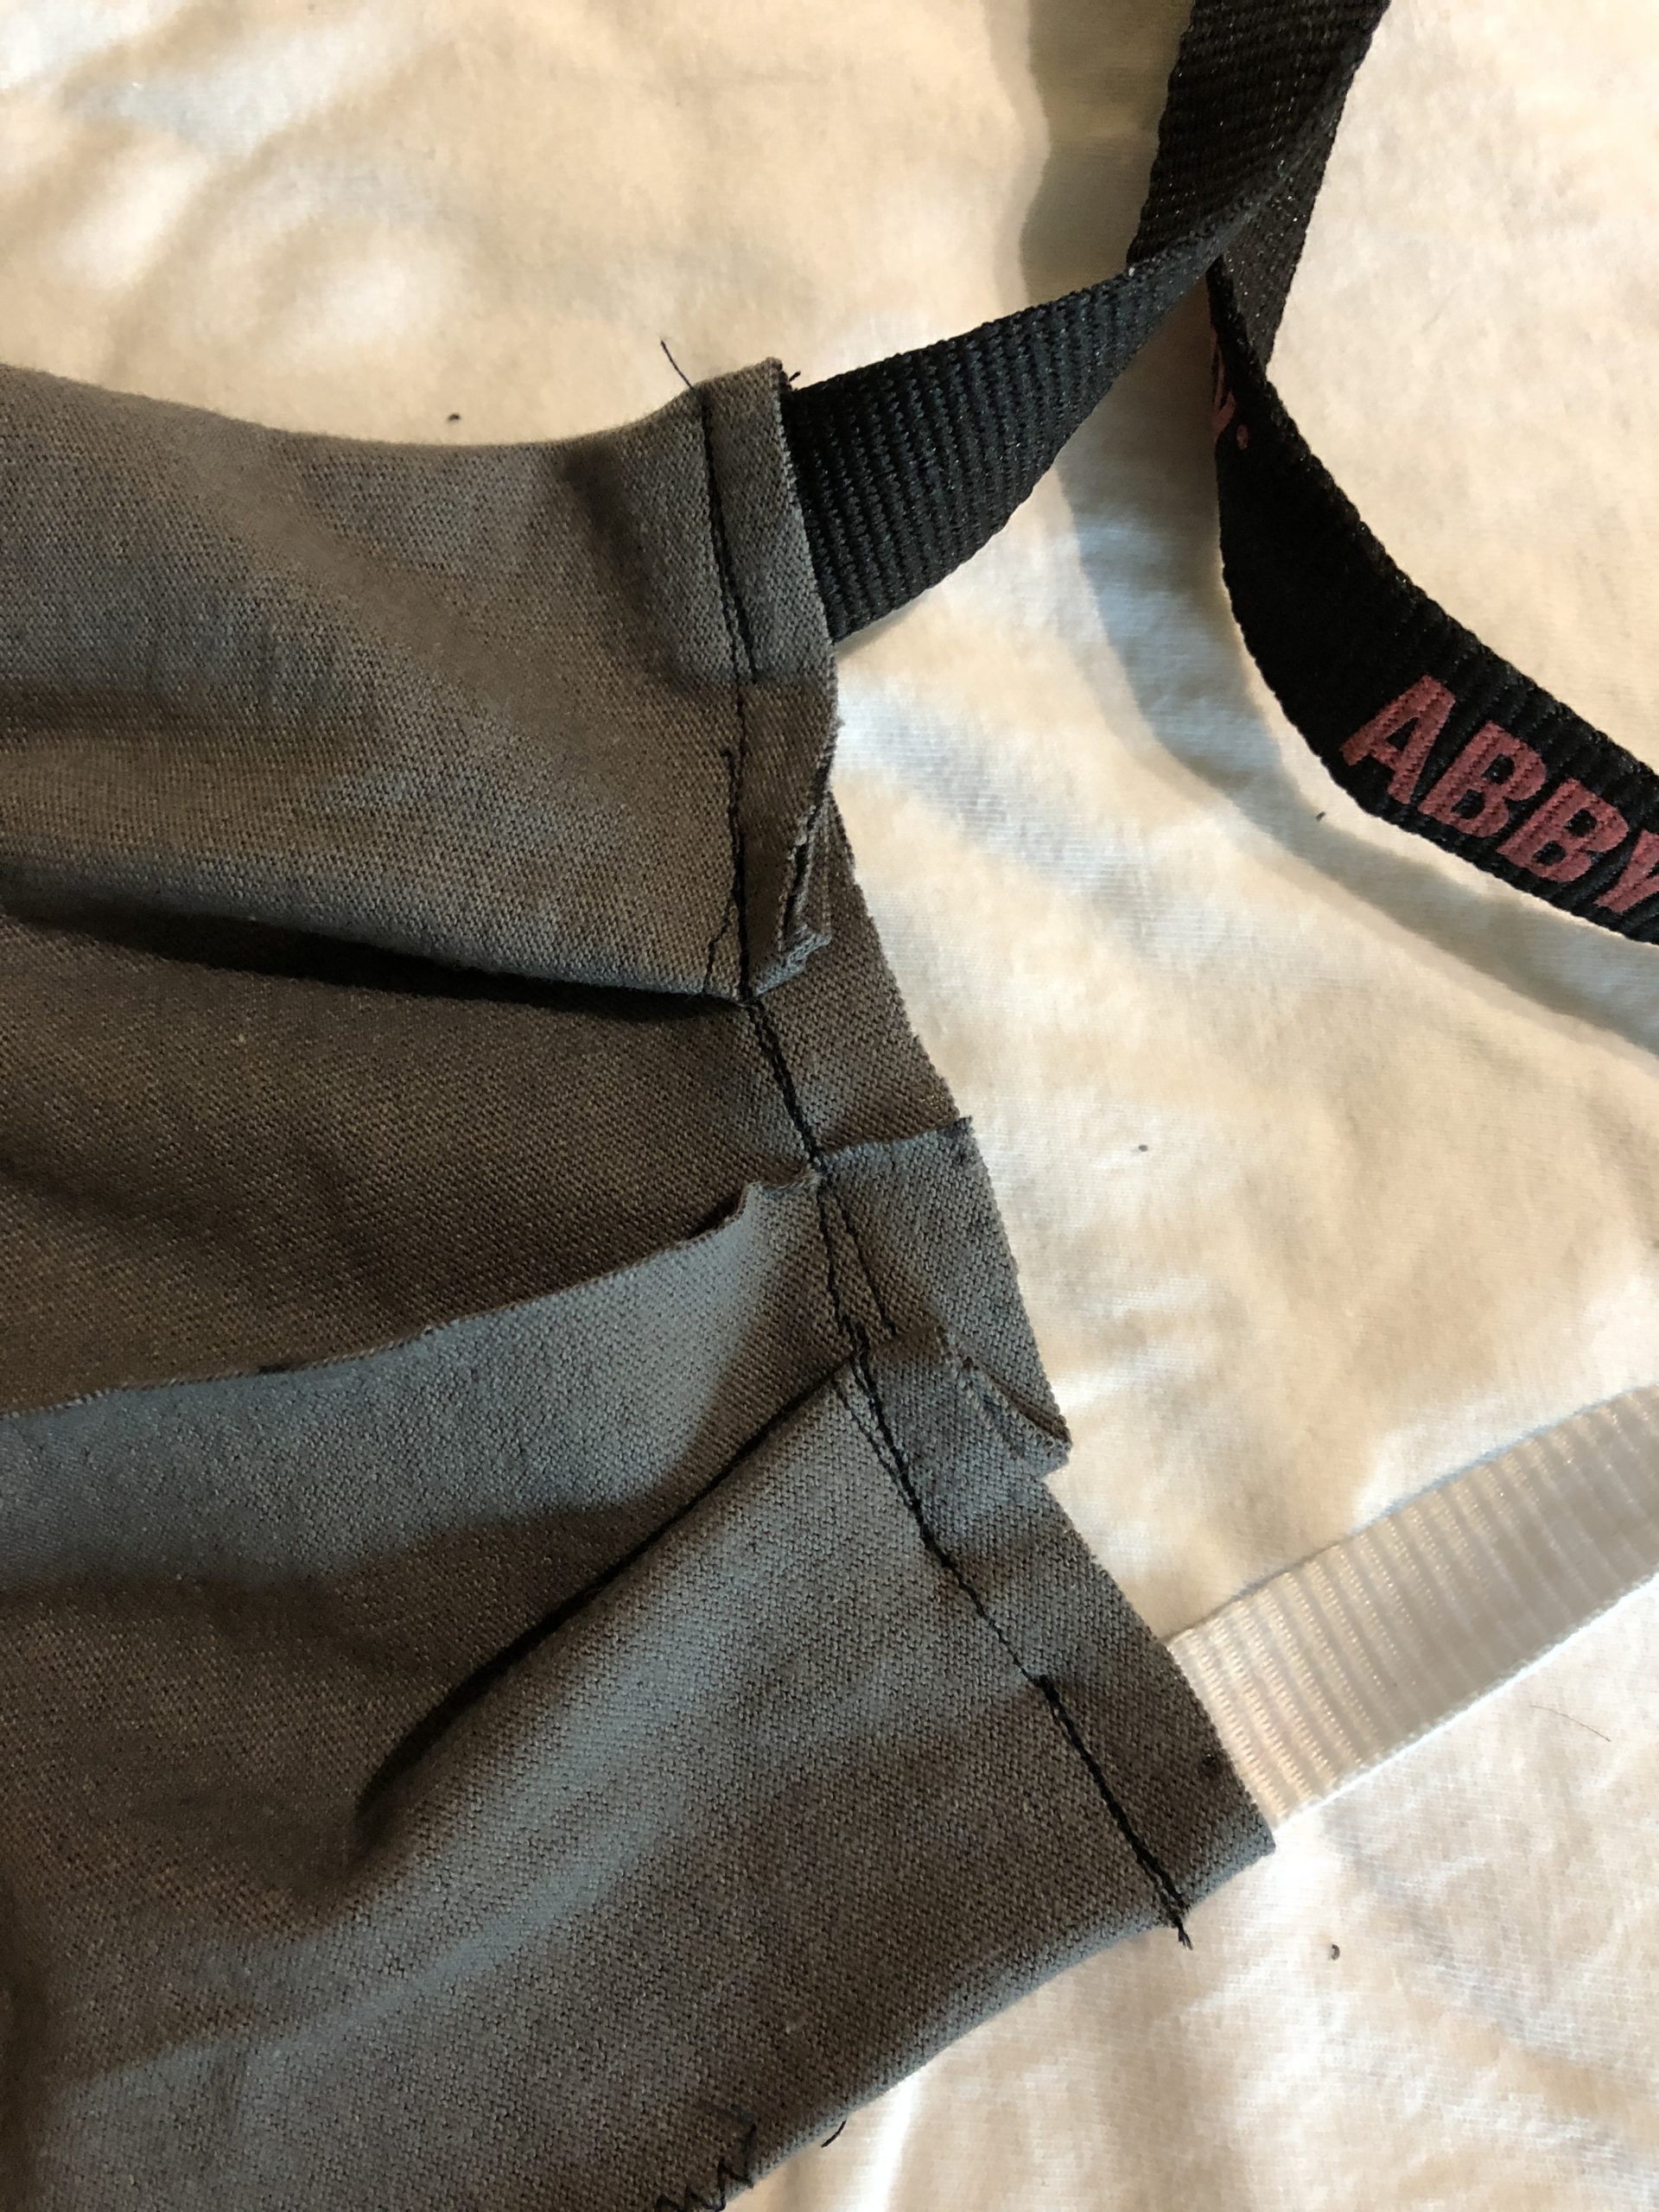
Now, it’s just a straight shot of sewing from top to bottom. I went back and forth over the ties a couple of times to make sure that they’re secure, then just stitched the rest of the way.
 Once it’s sewn, if you flip it over, it will look like the photo on the right. This is the outside of the mask, now with the ties sewn in place and the entire edge stitched closed.
 Now, pin the ties in place on the second edge, and pin the fabric overlap at the centre to prepare for sewing, just like you did with the first edge.
Sew that one just like you did the other, and you know have an almost completed mask.  The photo to the right shows the side of the mask that faces outwards, with the nose clip in the edge at the top.
Some of the fabric designs that I’ve seen online stop with a simple version like this, but I find it leaves large gaps at the sides, so I wanted to tighten it up like what the Taiwanese doctor did by adding tucks to his.
Adding side tucks
There are other ways to do this rather than the tucks that I’m going to show you. I did a couple of masks using elastic, but I don’t have a lot of elastic on hand and thought that most people wouldn’t unless they do a lot of sewing or crafts. If you have a shirring foot on your sewing machine, you can definitely use that. If you don’t know what a shirring foot is, then you probably don’t have one. I recall a hand-shirring technique that I learned in Home Economics class in junior high, but that part of my memory was overwritten when I learned my 4th programming language.
 Basically, I wanted to reduce the 17cm height of the mask that is required to stretch from nose to chin down to about 10cm at the edges. I added two large-ish tucks/pleats, angling them slightly in, and pinned them in place. This is shown from the inside of the mask, since I want the tucks to push out.
 You’ll see what I mean when we flip the mask over, still just pinned, and you can see that the two tucks will cause the mask to pleat it out away from your face towards the centre.
 Sew across the two tucks to hold them in place. There’s not going to be a lot of strain on these, so hand-sew them if that’s easier. The photo on the right shows what it looks like on the inside of the mask after stitching the tucks.
 And when we flip it over, the photo on the left is what it looks like from the outside after stitching.
Do the same on the other side, and the mask is essentially done. This is the completed mask with ties at each corner, and a bendable nose clip at the top:
Filter insert
We’re not quite done. Remember that open fold at the back of the mask? We’re going to insert an extra layer of filter material inside the mask, between the two layers of t-shirt fabric.
The mask would work just fine as it is, but will work better with an additional layer of a non-woven material inside to stop transmission of aerosolized particles. The doctor from the original design said that you could use a few layers of tissue that had been wet and then dried, so that it melded together. I was also talking with a friend about using a paper coffee filter.  Use your imagination here, as long as it isn’t embedded with any chemicals and air can pass through it sufficiently for breathing.
I found a great suggestion online, however…a piece of a Swiffer Sweeper cloth, cut to fit. It’s unscented and likely contains little in the way of harmful chemicals, although I might try out a few other things here.
 With the inside of the mask facing up, open the pocket formed by the overlapping edges of the fabric that we left across the middle of the mask. This is where the filter is going to go, and then the fabric will close around it.
 Push the filter into the opening, flattening it out so that you’re only breathing through a single layer of it. It’s going to be a bit harder than usual to breathe through the mask anyway, so you don’t want to make it worse.
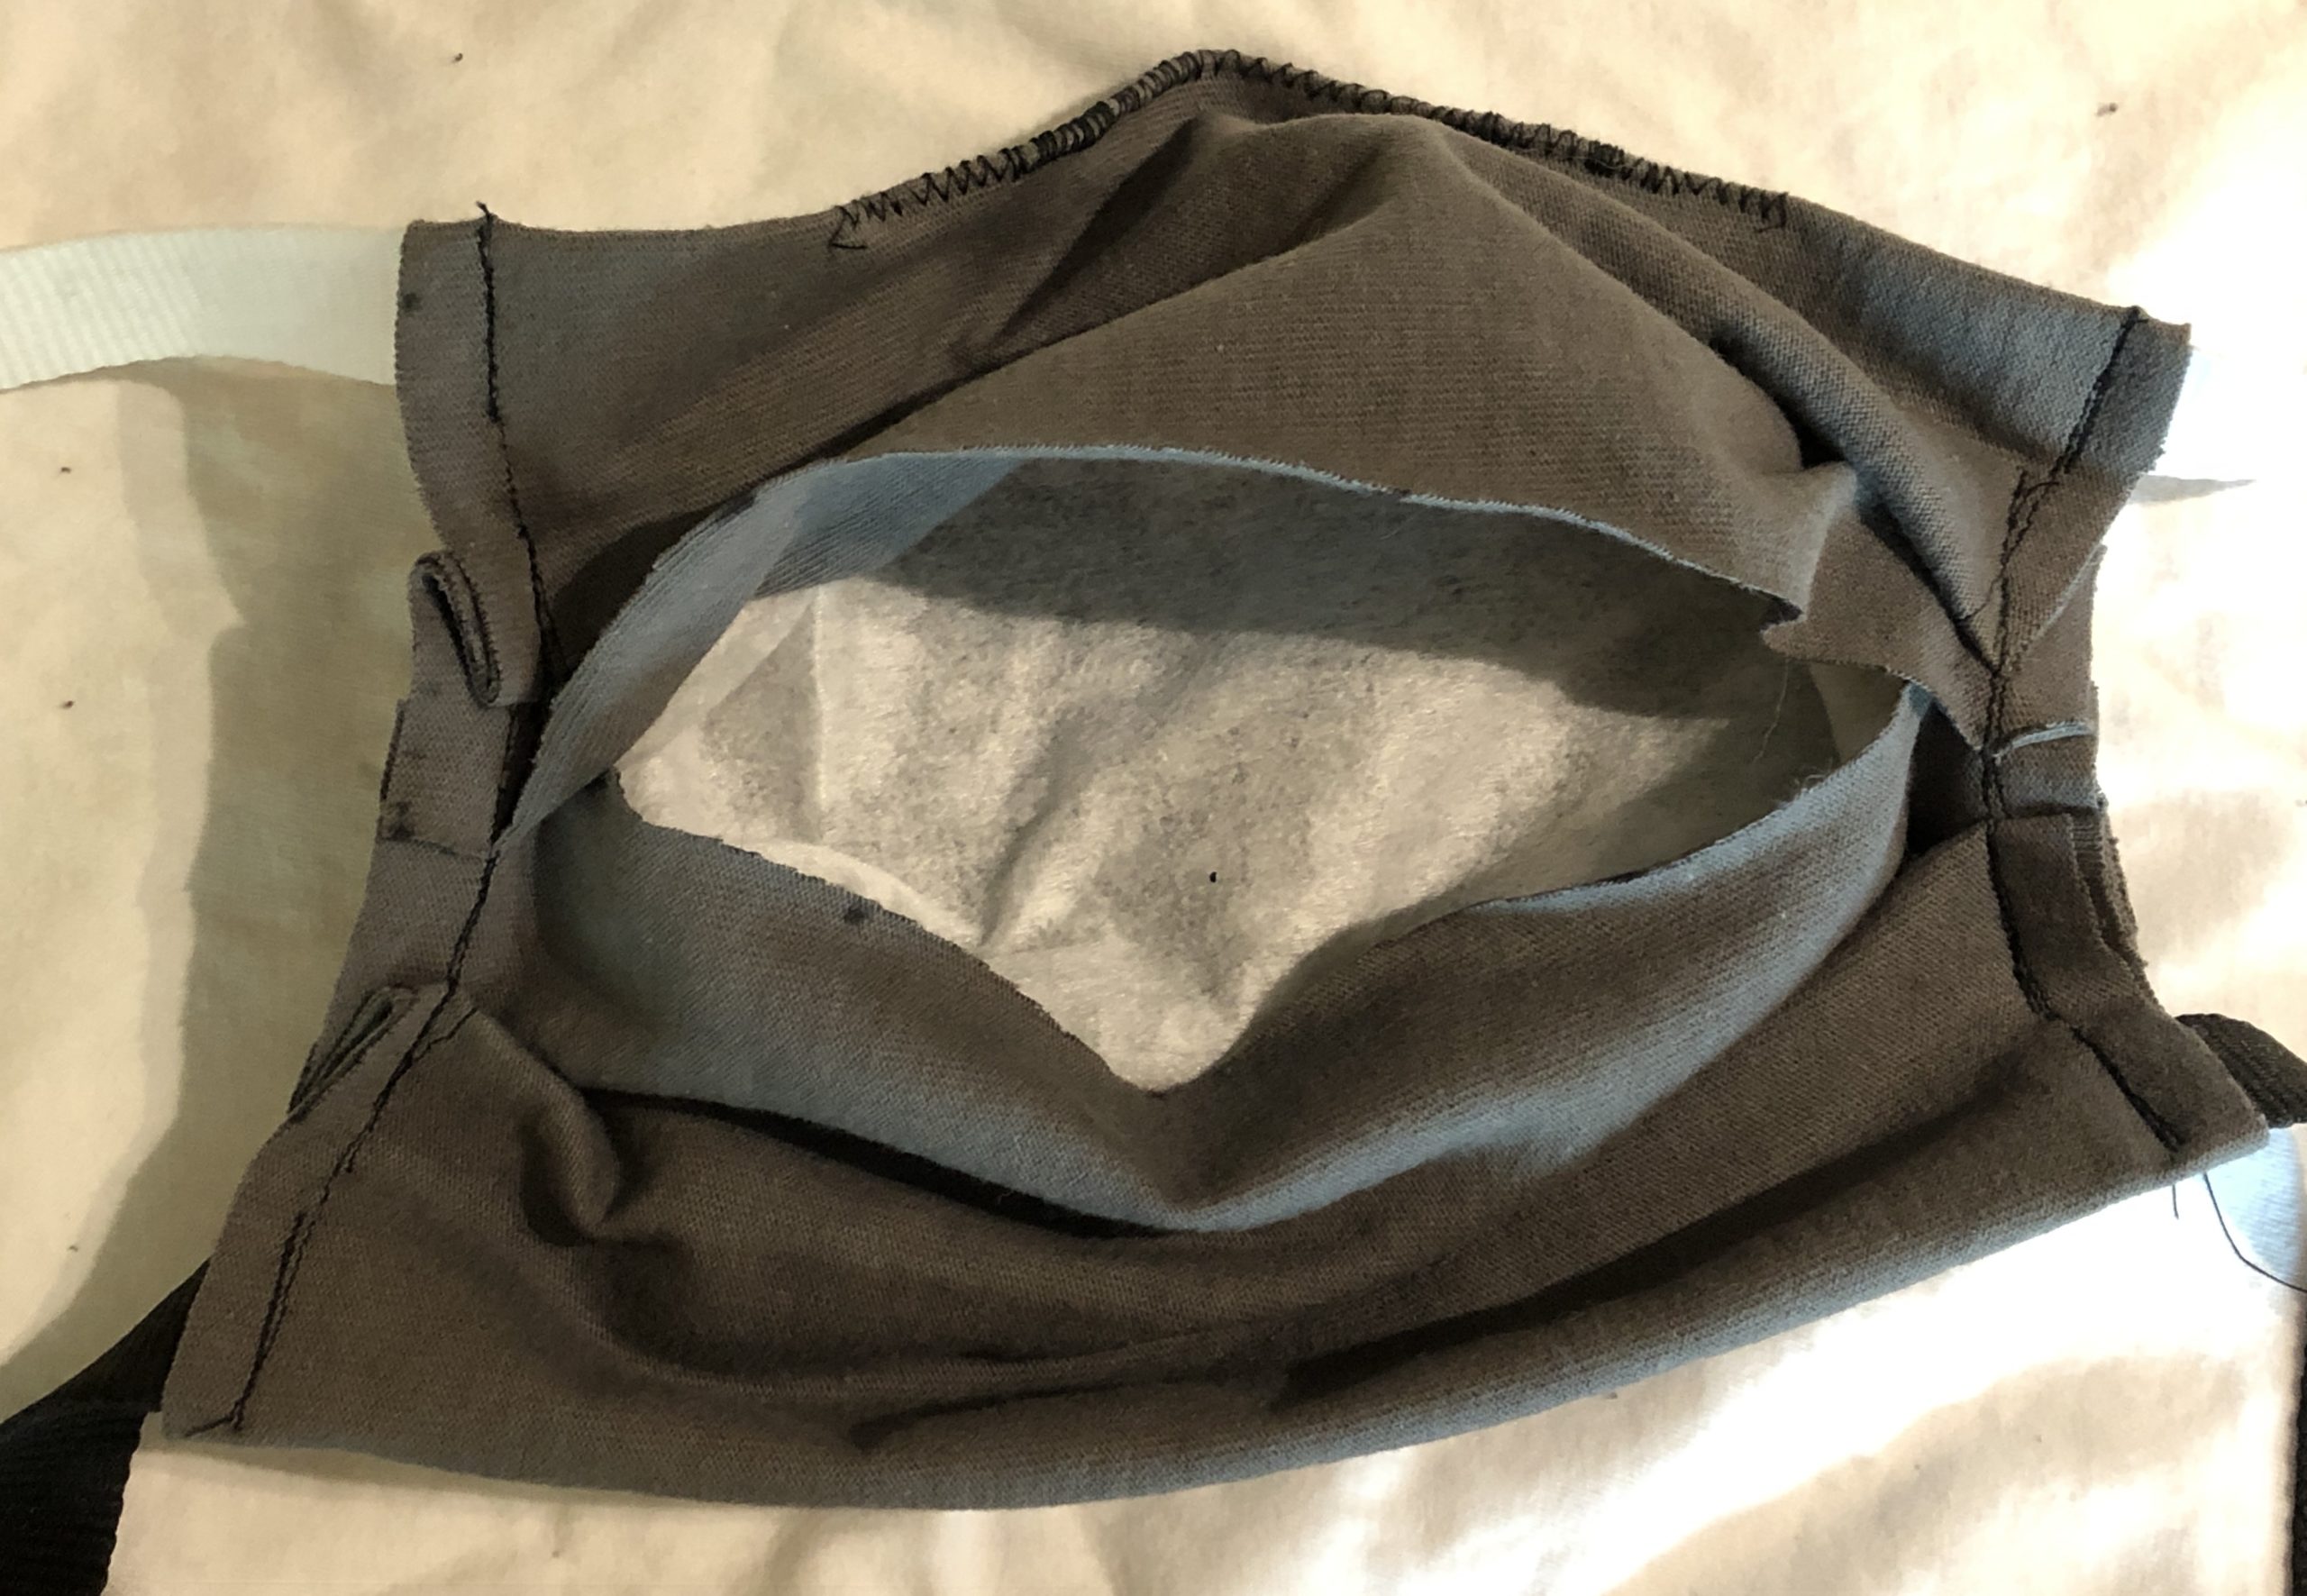 Now the filter is all the way inside the mask. Flatten it out and push it up into the corners for best coverage. If it’s too big, take it out and trim it rather than having rolls of extra filter material inside the mask.
 If you just tug gently at the sides of the mask, the opening closes over the filter, and you’re ready to go. I did one model that put a snap in the middle so that the opening was held closed, but it’s not necessary and the snap pressed up against my nose in an annoying fashion.
Adjusting and wearing
 Time to finally put the mask on. Before tying it on the first time, put the nose clip up to the top of your nose and mold it to fit over your nose. Once you’ve done this once, you probably only need to make minor adjustments, if any, when you put it on again.
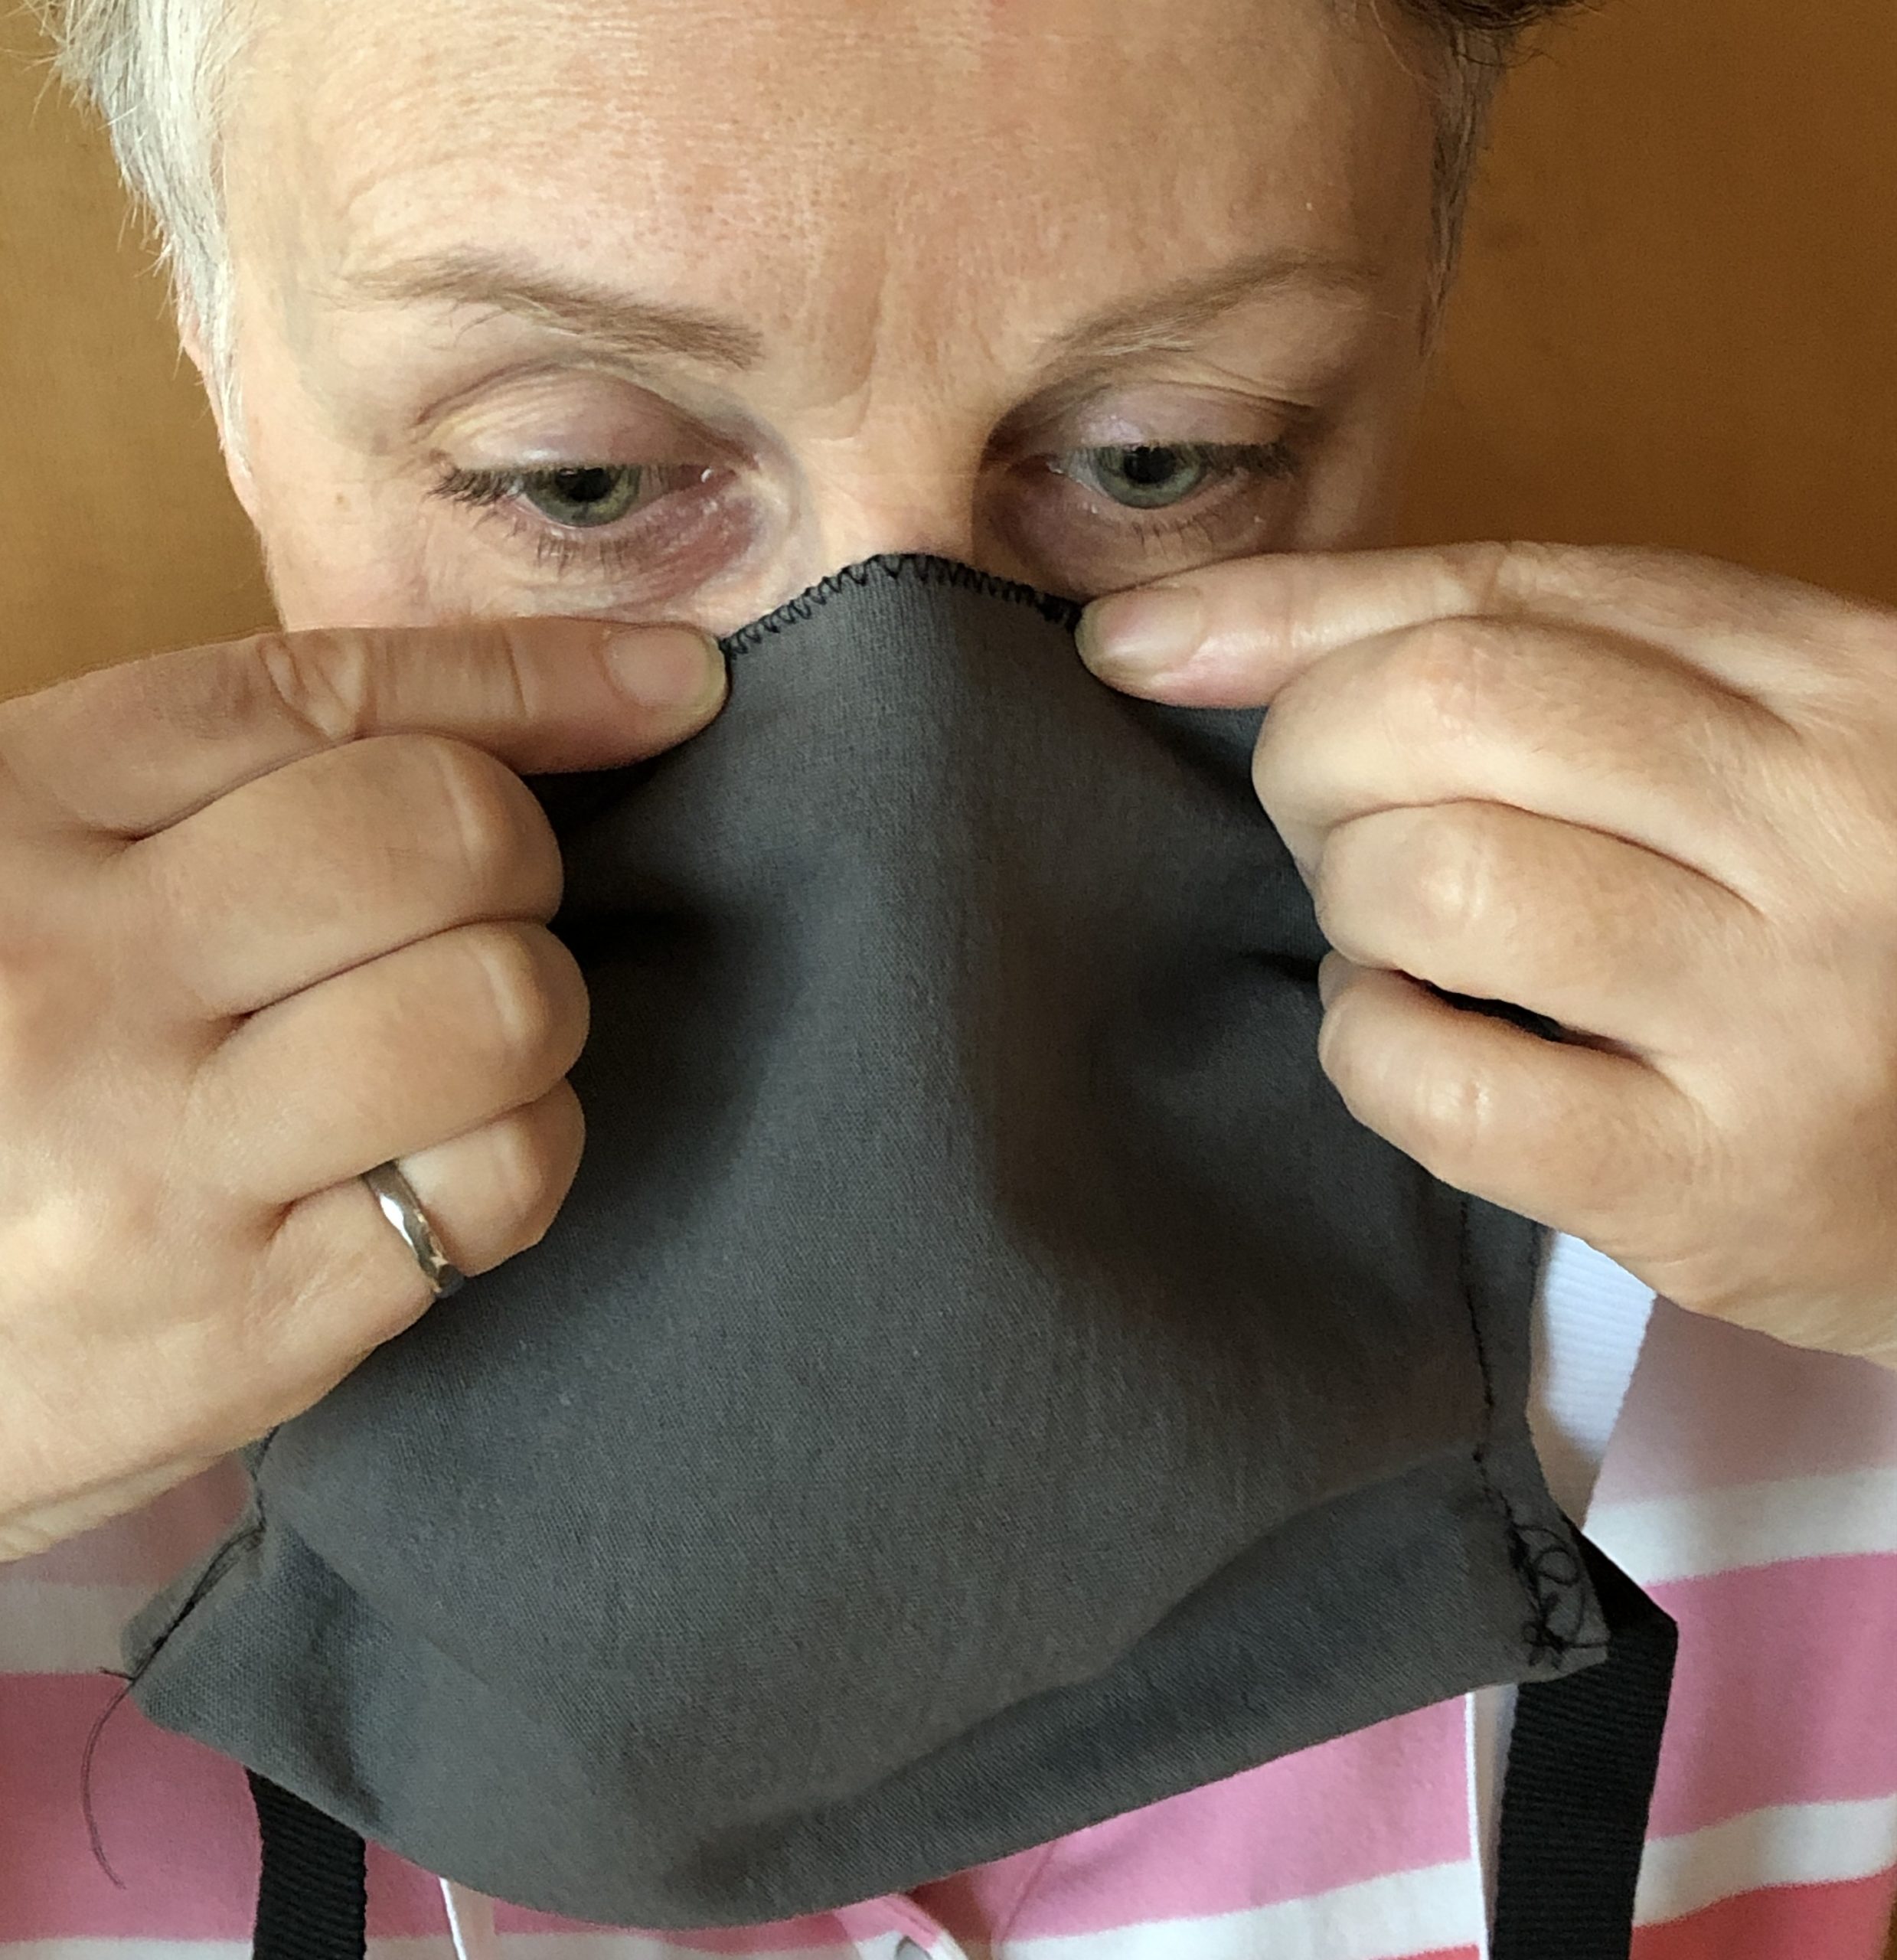 On the left, you can see how I’ve bent the nose clip down the sides of my nose, then flattened the ends of it to follow the edge of my cheek. This closes most of the gap between the mask and my face at the top edge, which reduces the opportunity for aerosol particles to get in, and also means that my glasses don’t fog up every time I exhale.
 Next, tie the top tie around your head. Make it nice and high so that it won’t slip down. This should be fairly snug but not uncomfortably so. Readjust the nose clip, since tying the top tie will usually pull it up a bit.
 The bottom tie goes around and ties at the back of your neck, and can be fairly loose. Notice how the tucks conform to the side of my face so that the mask fits closely there. I’m thinking in the next version to add a tuck right in the middle of bottom edge to have it hug the chin closer, but this is pretty good.
General wearing instructions
A few tips about wearing, then I’ll show you a final hack in case you don’t have a conference lanyard.
- Always put a clean mask on with clean hands.
- Try not to adjust the mask once your hands may no longer be clean. In general, put the mask on before you leave home, and take it off when you come back.
- Since the outside of the mask may have picked up something, be sure to wash your hands after you take it off. If you have to take it off while outside, you can untie the top tie and let the mask hang forward over your chest while it’s still tied around your neck, then wash your hands or use hand sanitizer before touching your face. To put it back on, just pull up and tie.
- There are a few different ways to clean the mask.
- If it’s not dirty but may have contacted the virus, you can just leave it for 24 hours. I’m basing that recommendation on the time that it takes for the virus to deteriorate on a porous material such as cardboard.
- You can wash it in warm soapy water while you’re washing your hands. Rinse in clear water, squeeze out and hang to try.
- You can also do the equivalent of a medical autoclave, and steam it over boiling water for 10 minutes. Obviously, don’t put it in the microwave because of the metal paperclip.
 Here’s the final hack. If you don’t have a conference lanyard, or a pair of bootlaces or the drawstring from your pajamas, you can create ties by trimming the bottom (hemmed) edge off the t-shirt and cutting it to the right length. If you trim it a little bit away from the stitching, as you can see at the bottom, it won’t even need to be hemmed.
You can also fold and sew strips into ties, but probably you can find something already made to use instead.
That’s it for my DIY mask for techies, made from a t-shirt, 2 conference lanyards and a paperclip. I don’t plan to start any series of DIY coronavirus supplies, but if you’re interested in business process automation and how our world of work is changing in these changing times, check out some of my other work.
Stay safe!
Thank you! Two made so far, one for me and one for Andrew. One question, any idea how often you need to replace the liner? I have some iron-on interfacing which I can breathe through – the iron-on “glue” isn’t a problem, and used that. Seems to work ok.
If you did an iron-on interfacing that could be washed, then that would be fine as a permanent filter. I take the filter out to wash the mask, and usually change it then, too.
Thanks! I knew someone out there would have these instructions! I have a handful of tech conference lanyards and I will give this a try! Appreciate it!
Thanks so much! I was wondering what to do with all my extra lanyards!